This end-to-end project was conducted during my PhD and it was about the
creation
of age-appropriate educational tools for younger children (5 to 8) with type-1
diabetes (T1D).
The outcome was a real world product which was evaluated through a large scale
evaluation.
I employed a User-Centred Design process (Figure 1) in the clinical context in order to design a viable solution of the lack of age-appropriate educational materials.
In total 8 clinicians, 1 national T1D co-ordinator, 27 parents and 21 children were involved in all steps of the process and their input guided the design of an educational tool.

Understanding the context
In order understand the context I contacted interviews with the clinicians,
an online survey for the parents and also observed an educational sessions
in the clinic, where clinicians were educating young children.
The results were analysed qualitatively (thematic analysis) and were used as
an input for the next step.
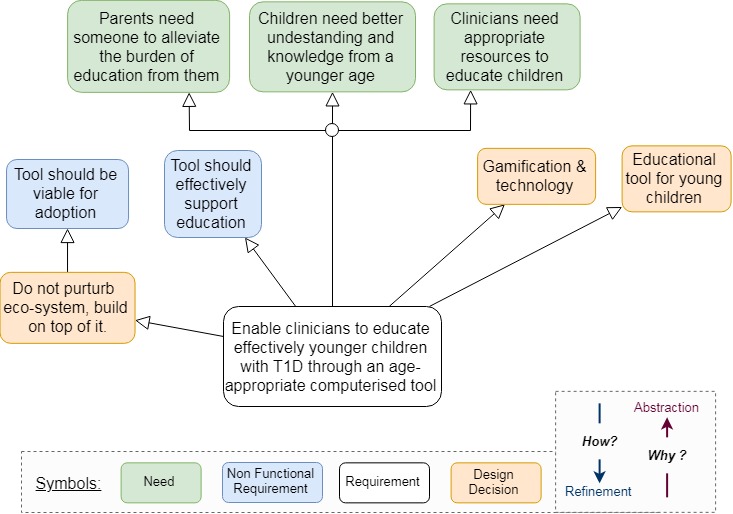
Specifying the requirements
The analysed results of the contextual enquiry were analysed and synthesised
in order to understand the needs of the stakeholders and elicit the requirements.
A deductive and iterative process (see twin peaks model [1]) was combined
used for the specification of the requirements and the design decisions.
The KAOS modelling technique was used for the mapping and refinement of the
requirements.
Design and Implementation
After specifying the requirements the next stage was to prototype and
iterate the prototypes until they are refined.
I chose to extend the current approach of the educating children through
plastic food toys, by making the toys interactive. Their tangible nature
was making them ideal for interactive and playful learning.
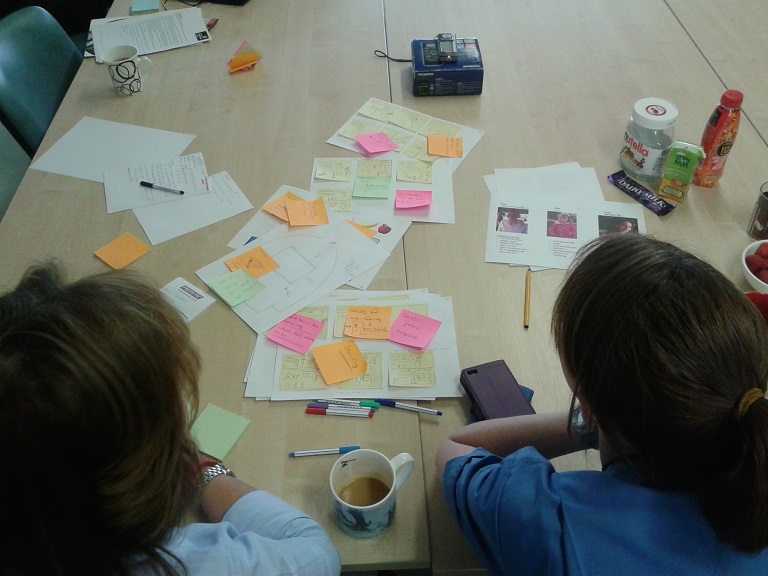
Paper prototypes and Pluralistic Walkthrough
Initially I rapidly prototyped a set of paper prototypes, story boards and 2D graphics for the output of the tool (Figure 4).

The prototypes were evaluated by 3 clinicians through a Pluralistic Walkthrough. The prototypes were annotated with the Keep-Lose-Change methodology (see Figure 5)
Implementation
The results of the evaluation were analysed and led to the creation of a series of
prototypes - each one with an incremental fidelity, starting from a smartphone
prototype
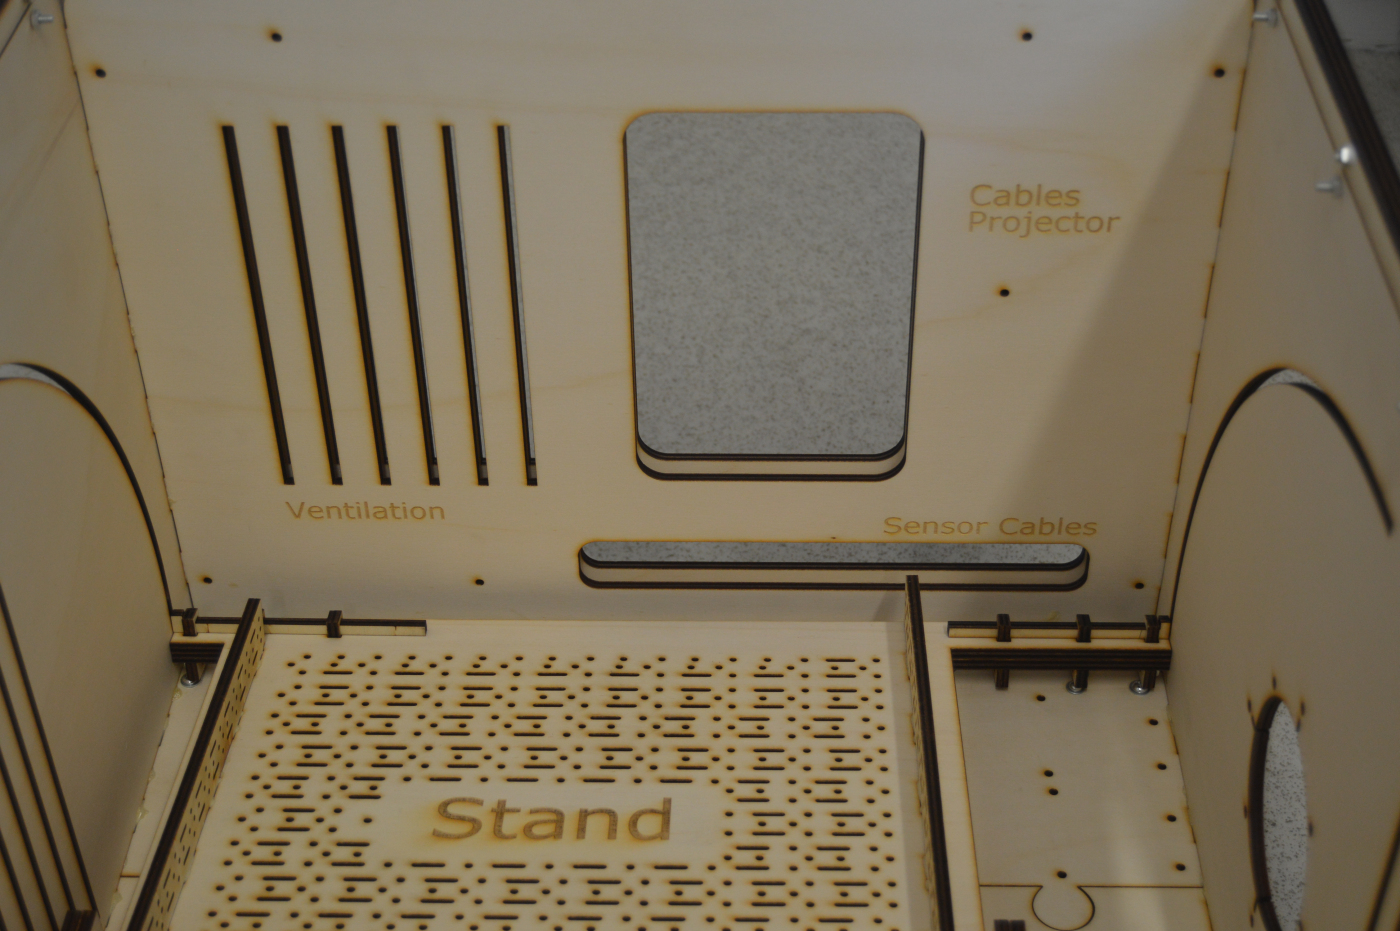
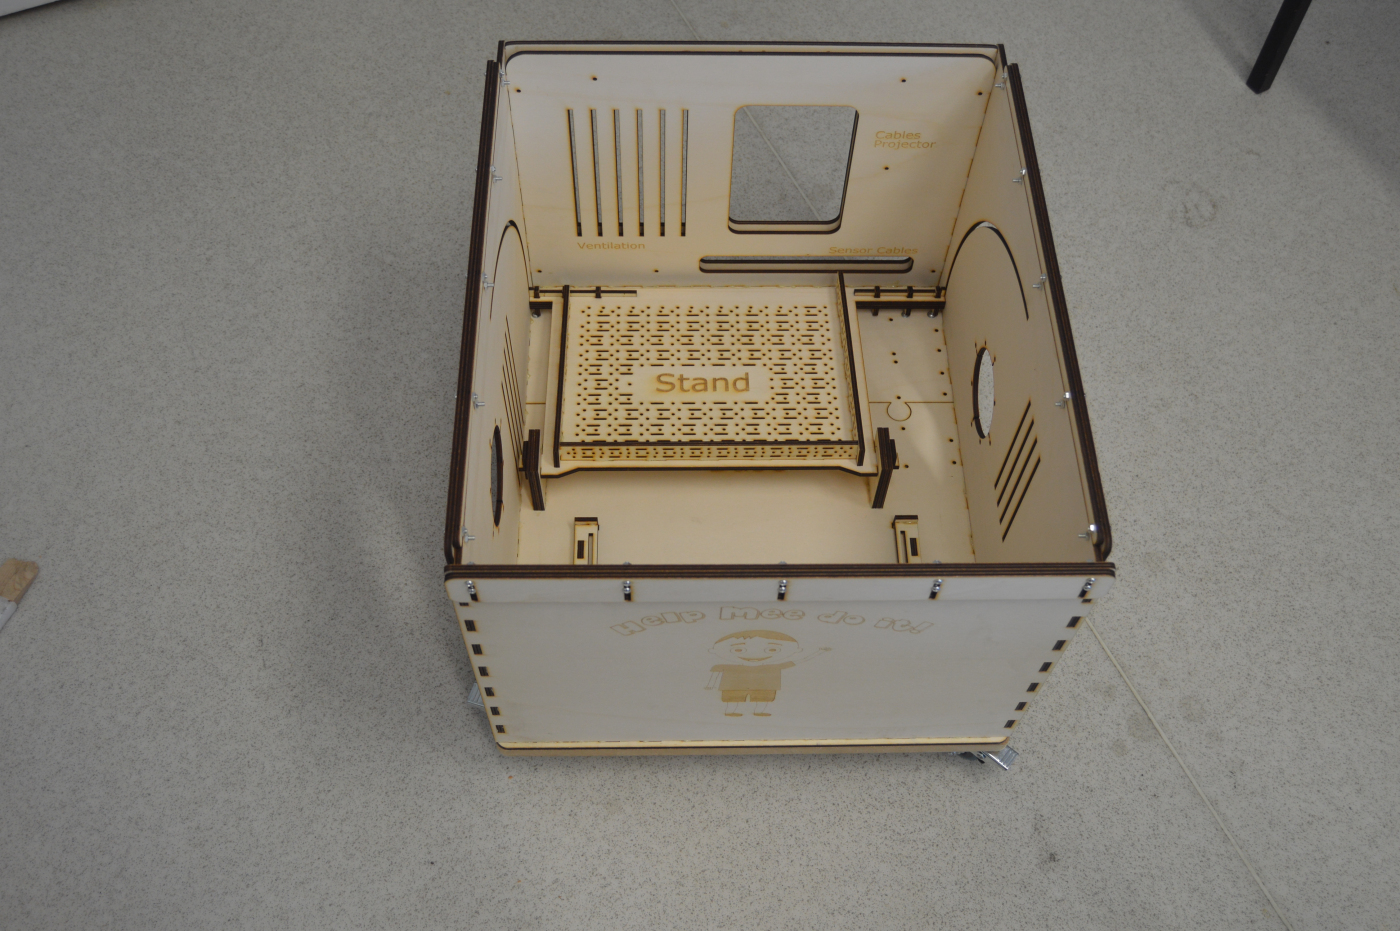
and ending to a hand-crafted stand alone station.
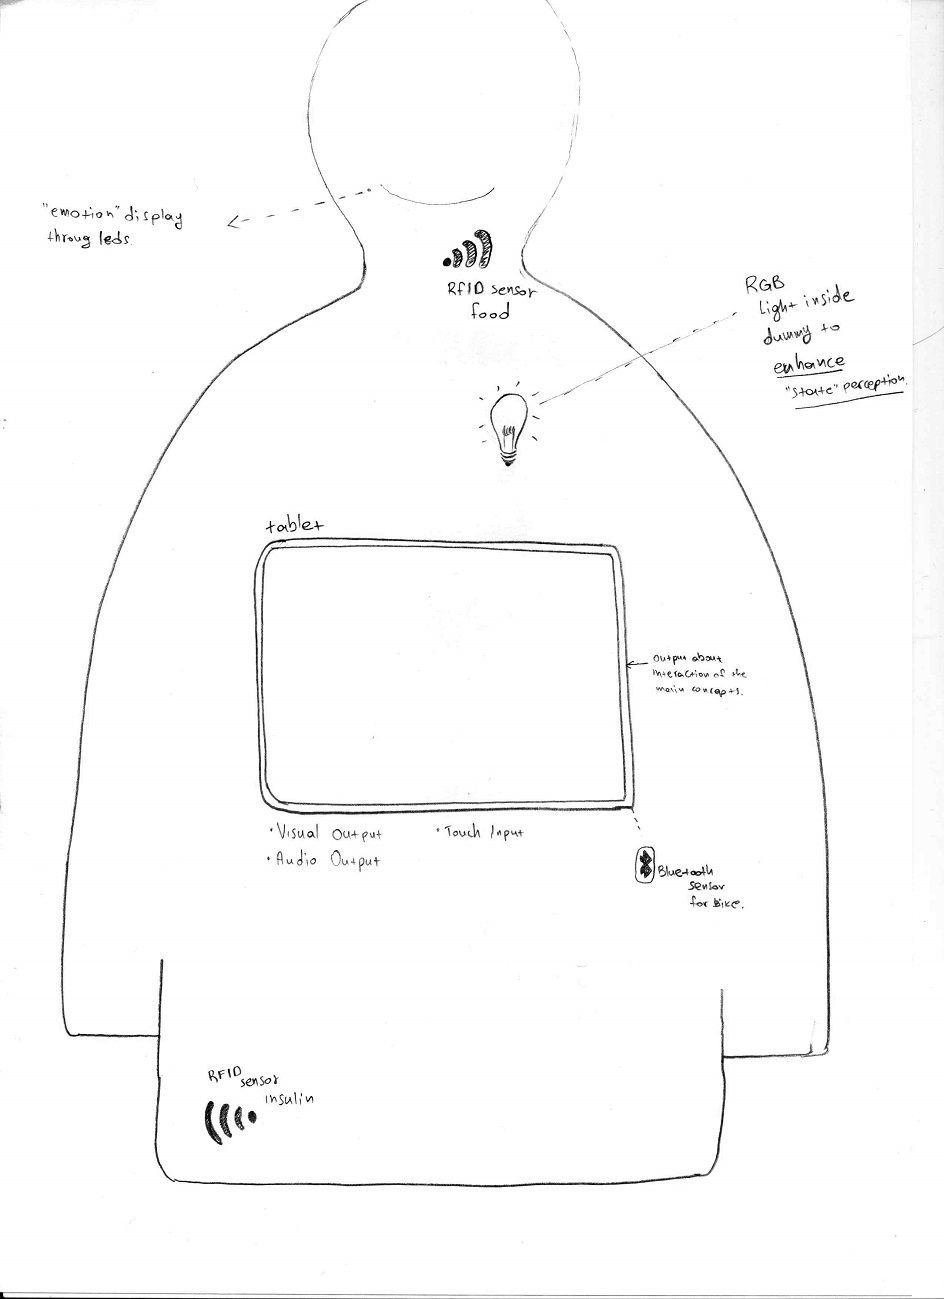
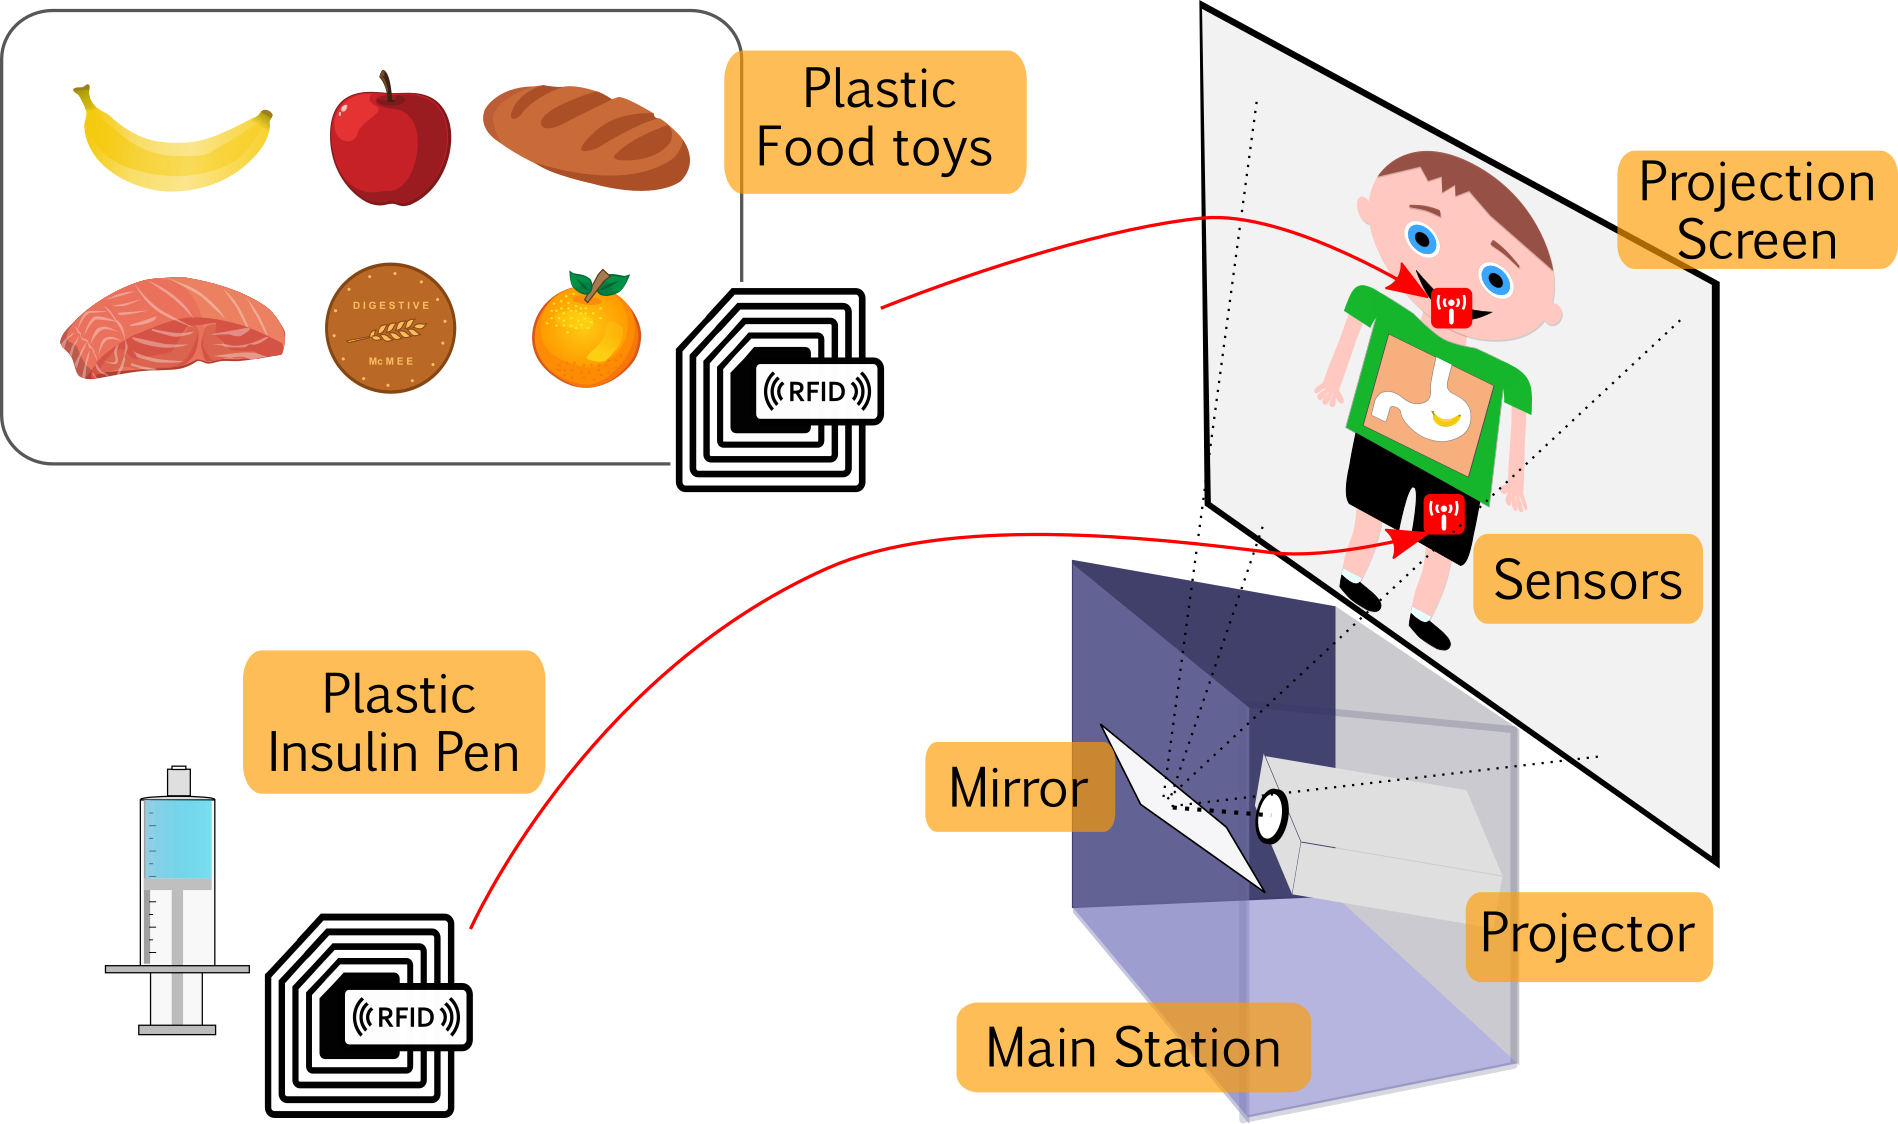
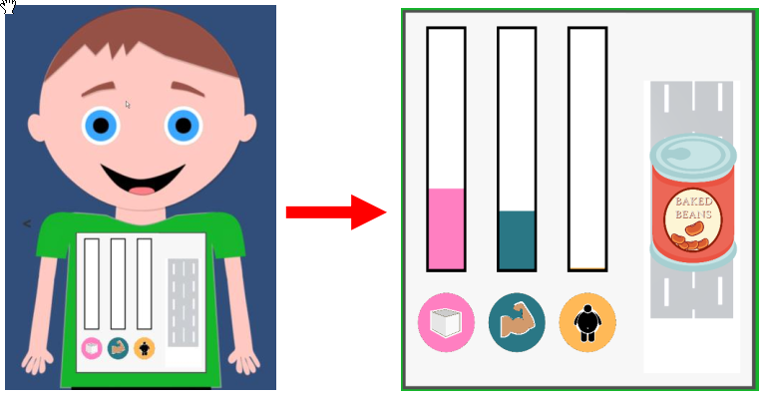
Figure 6 presents an overview of the tool as it was conceptualised, based on the
feedback from the prototypes' evaluation.
The tool comprises of the three components:
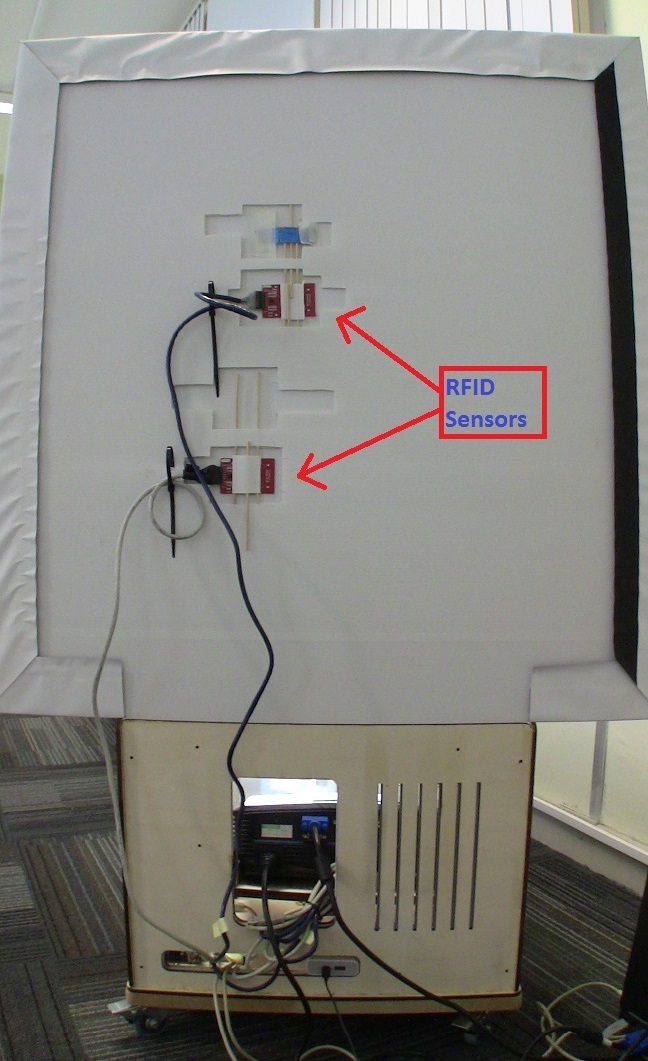
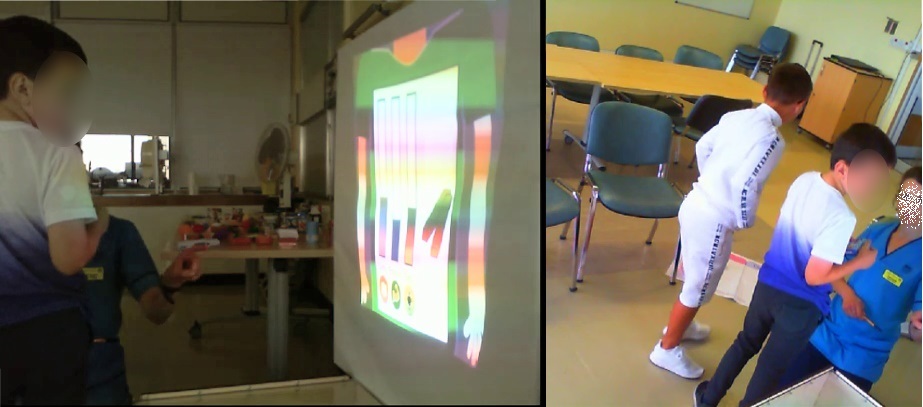
- A main game station with an attached screen. a projector in the station projects through a mirror to the screen. The screen has attached RFID scanners for sensing the interaction
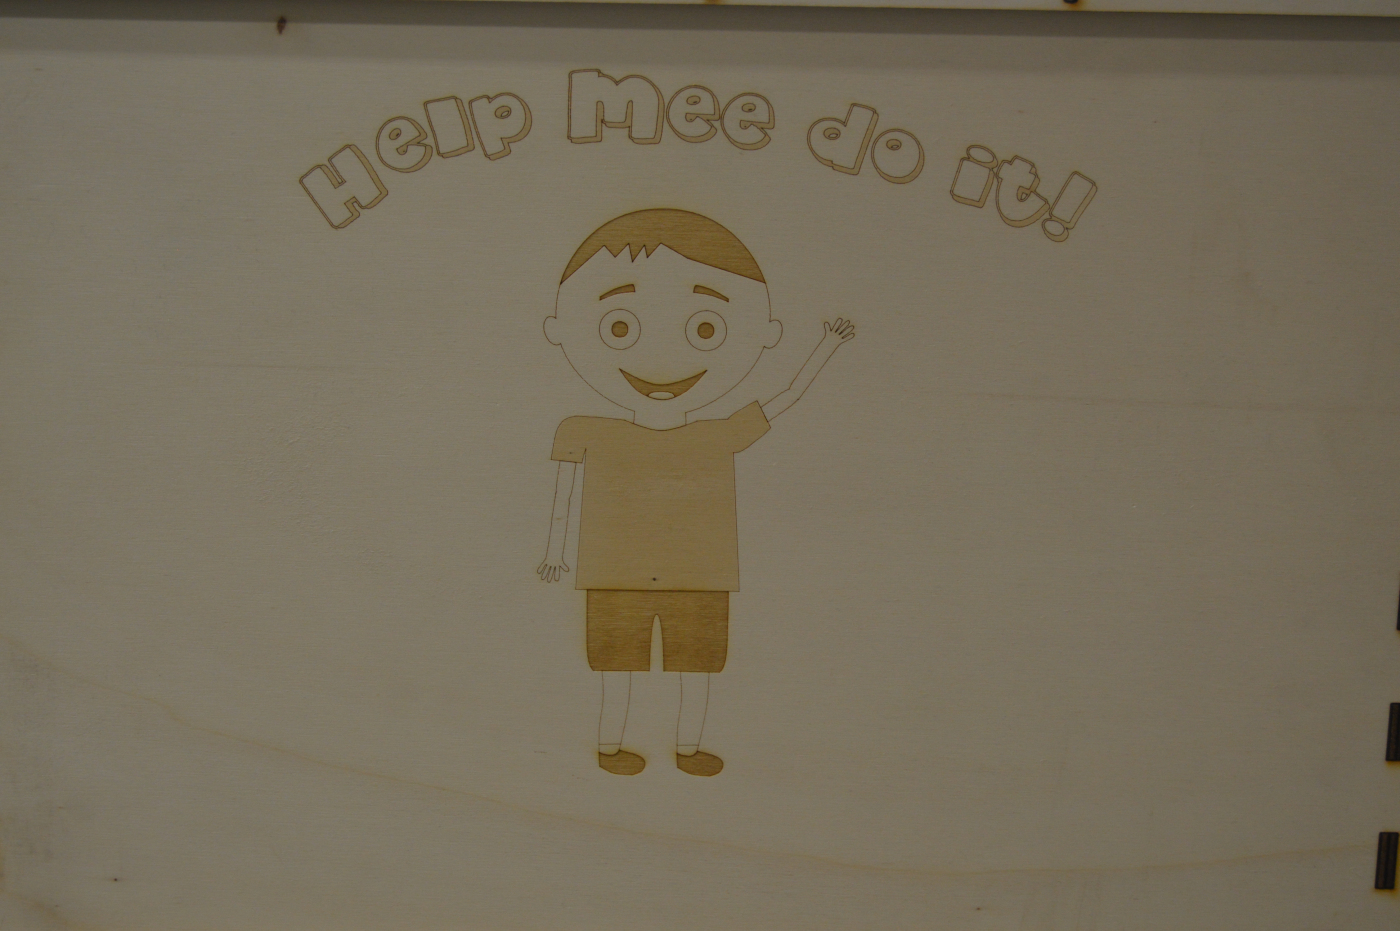
- The plastic food toys embedded with RFID tags. These toys are used as input devices in order to feed the anthropomorphic character, who is called "Mee".
- A plastic (fake) insulin pen for providing insulin to to Mee. The plastic pen has also embedded an RFID tag for interacting with the sensors on the screen.
Inspired by the "maker movement", which came to my attention during CHI2016,
I decided to craft the main station and toys my-self. This was, I was able to
control the quality of the end product and also expand my horizons by learning new
techniques and tools!
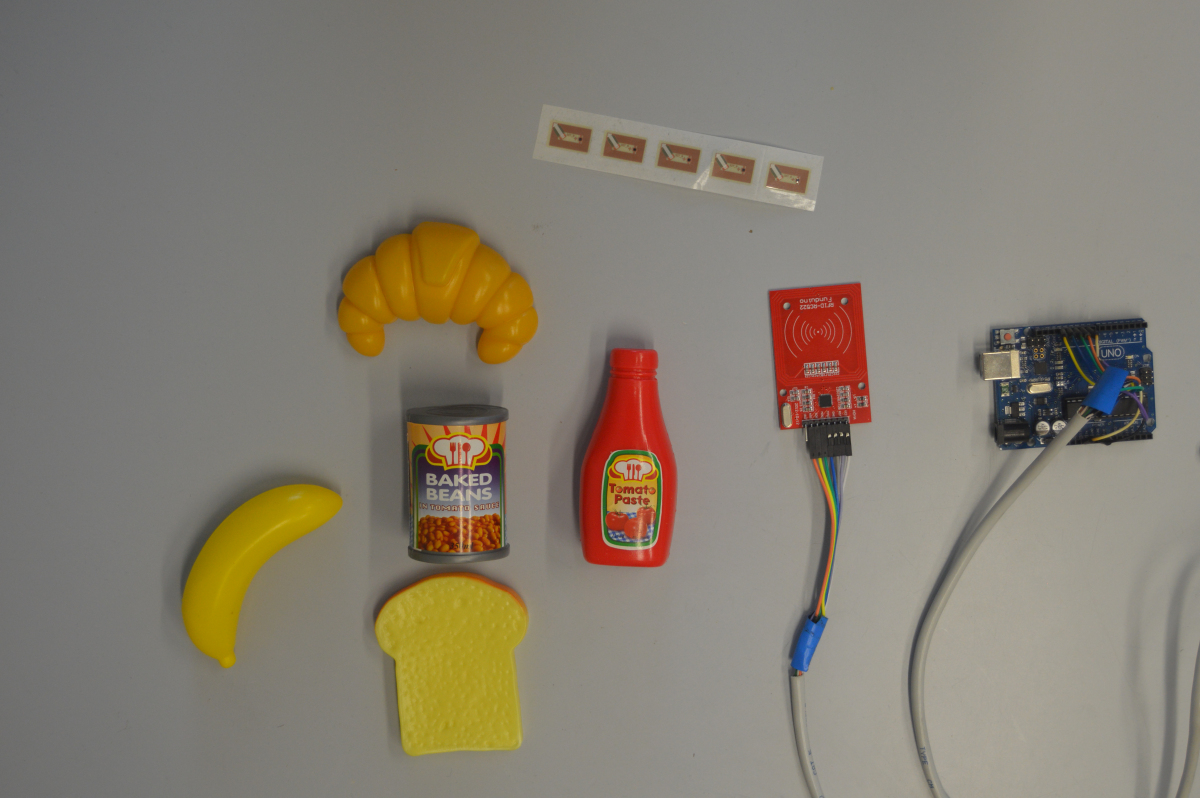
I started by experimenting with RFIDs and sensing them through Arduinos. This was
the backbone of the interaction and had to be robust in order to accommodate
children's interactions, who might not have fully developed fine motor skills.
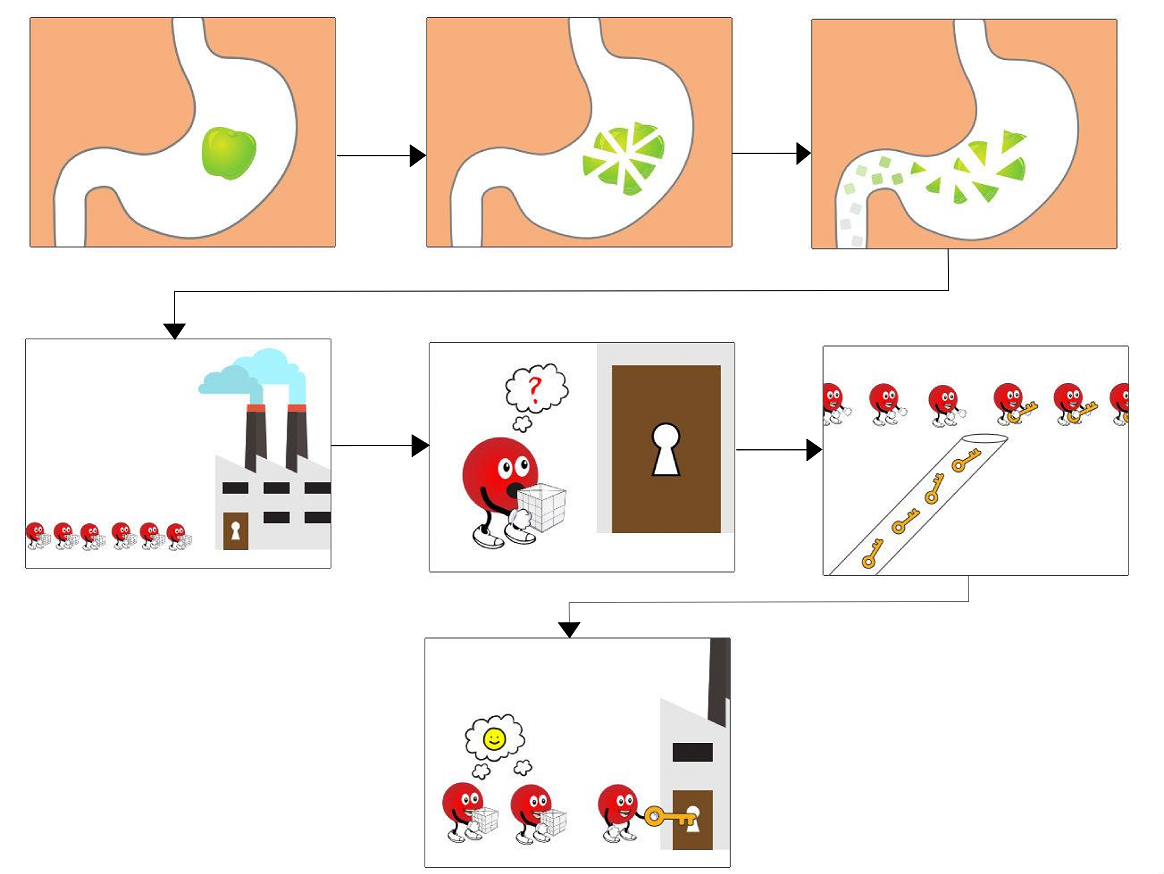
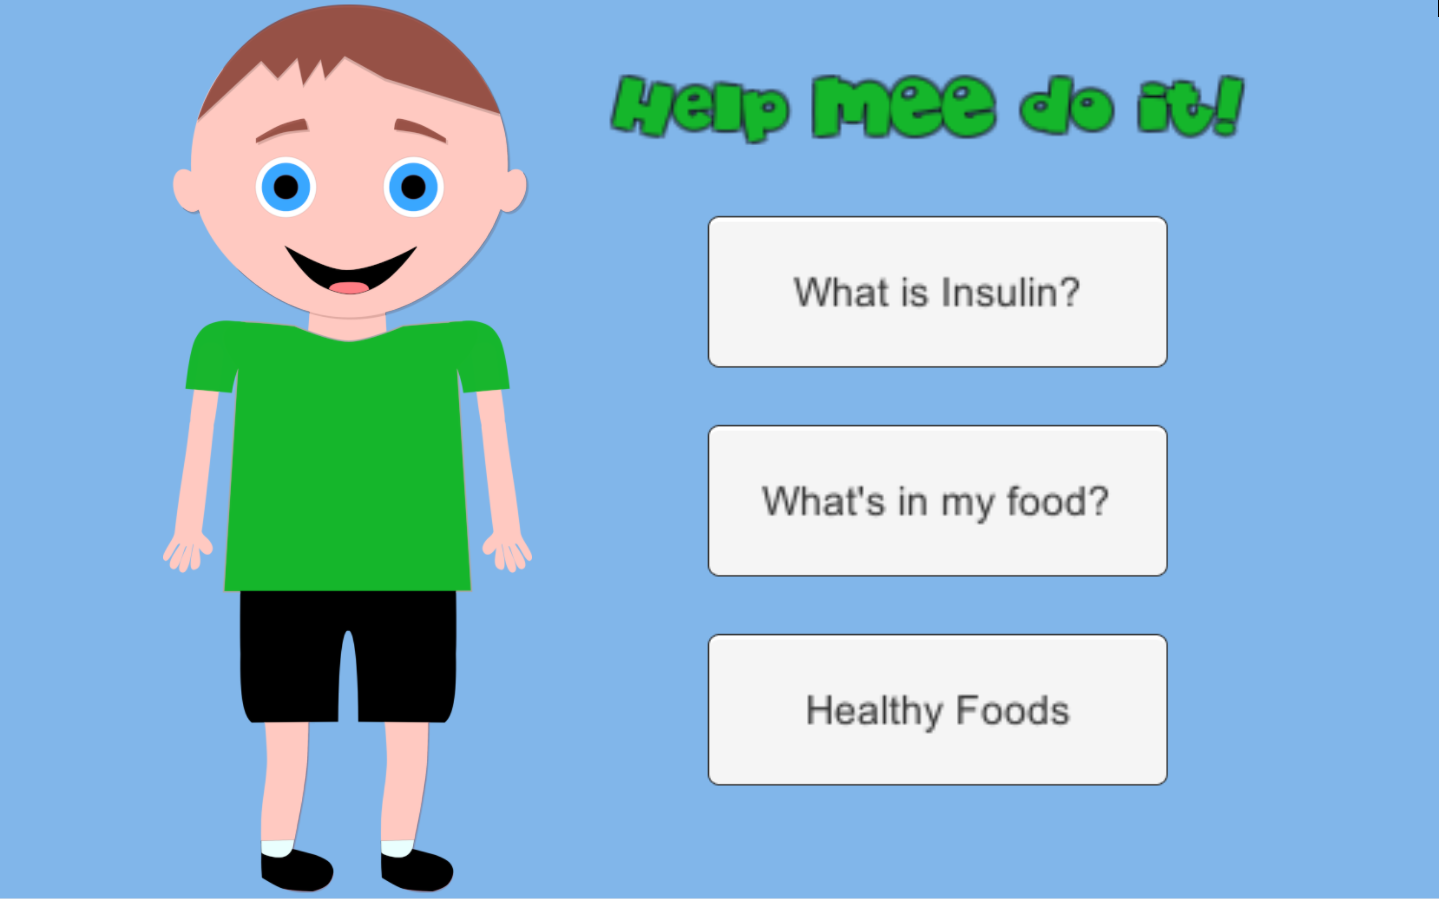
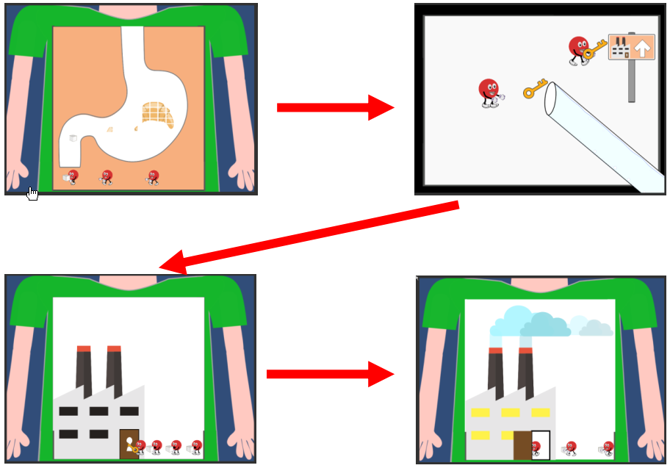
The next step was to develop the 2D graphics and the logic. For the 2D animated graphics I used a range of freeware programs: Inkscape, Blender3D, Synfig Studio. The UI and the logic were developed in Unity3D. Figure 8 shows examples of two animations for two scenarios \What’s in my food" and \What is insulin". Figure 6.11 shows the main screen of the tools User Interface.
As soon as the 2D graphics and the logic were ready, I started
crafted the game station. Initially I started with hard-wood
as a quick and simple solution. However, I quickly realised that
this solution was not scalable and also it was could not support
a fine level of detail.
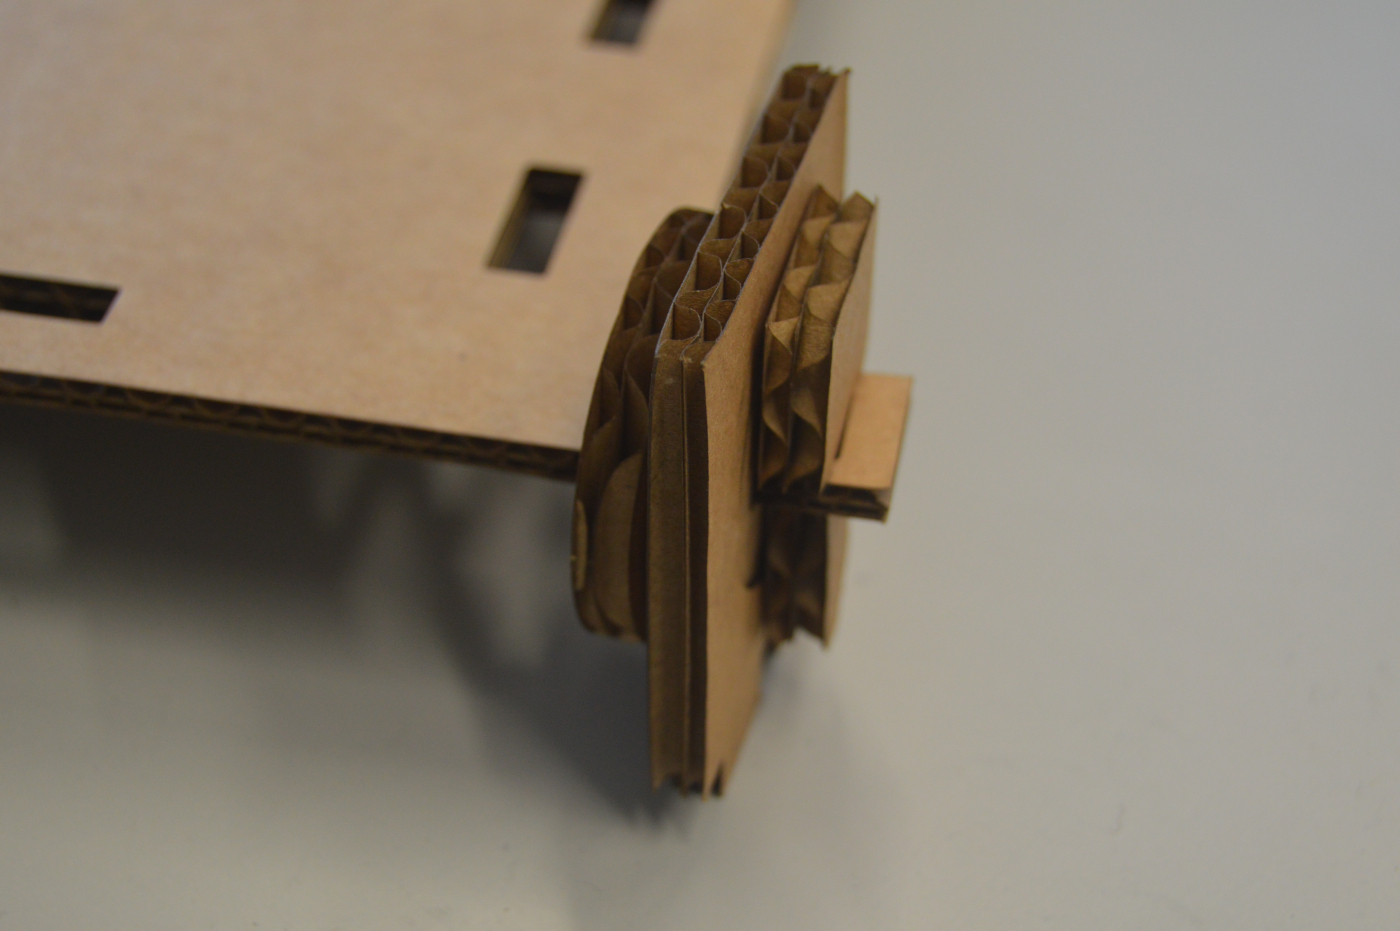
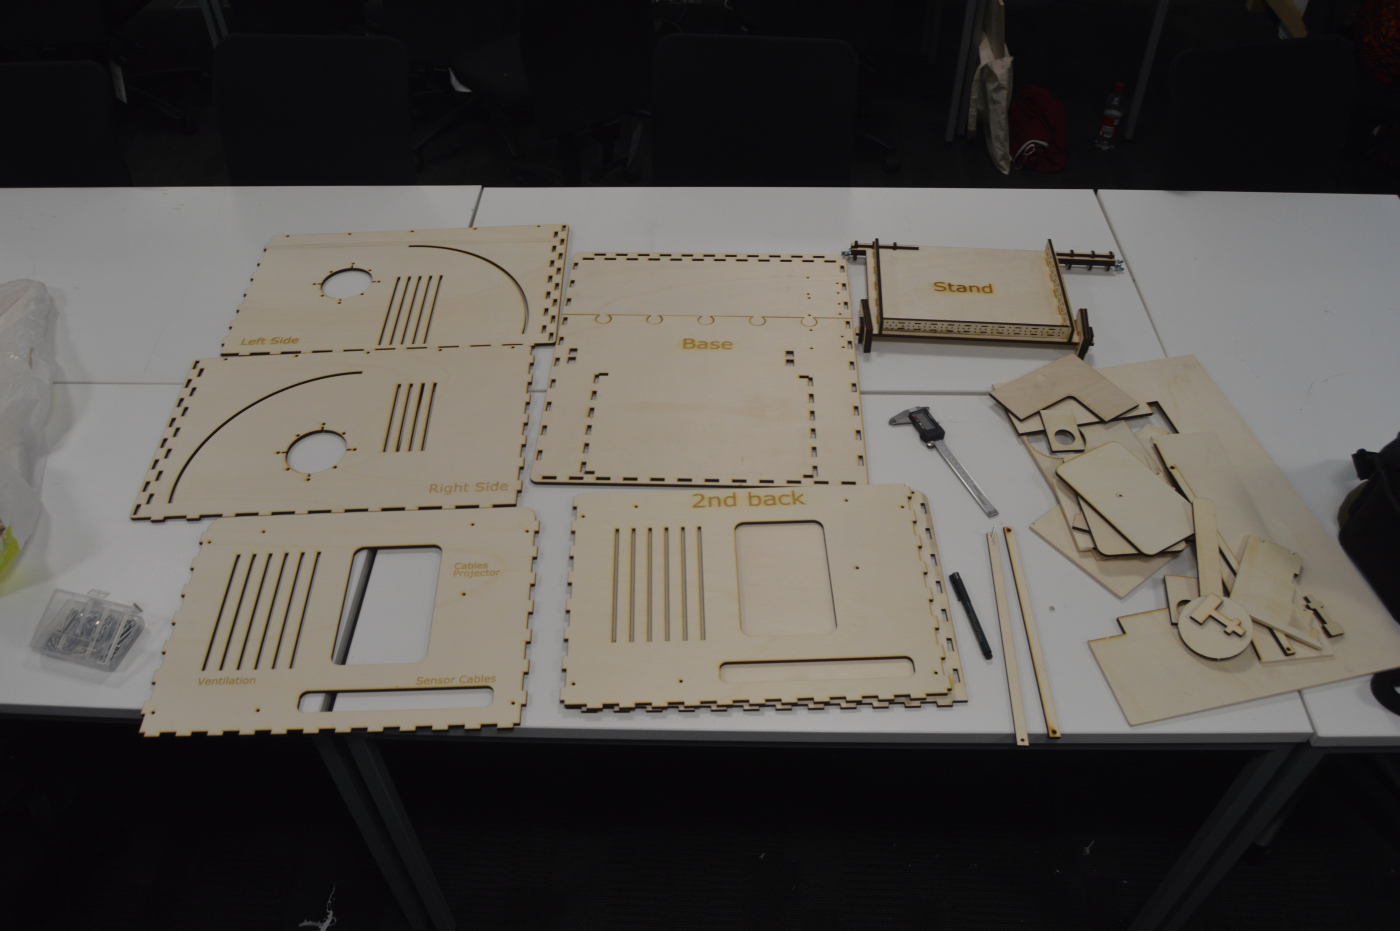
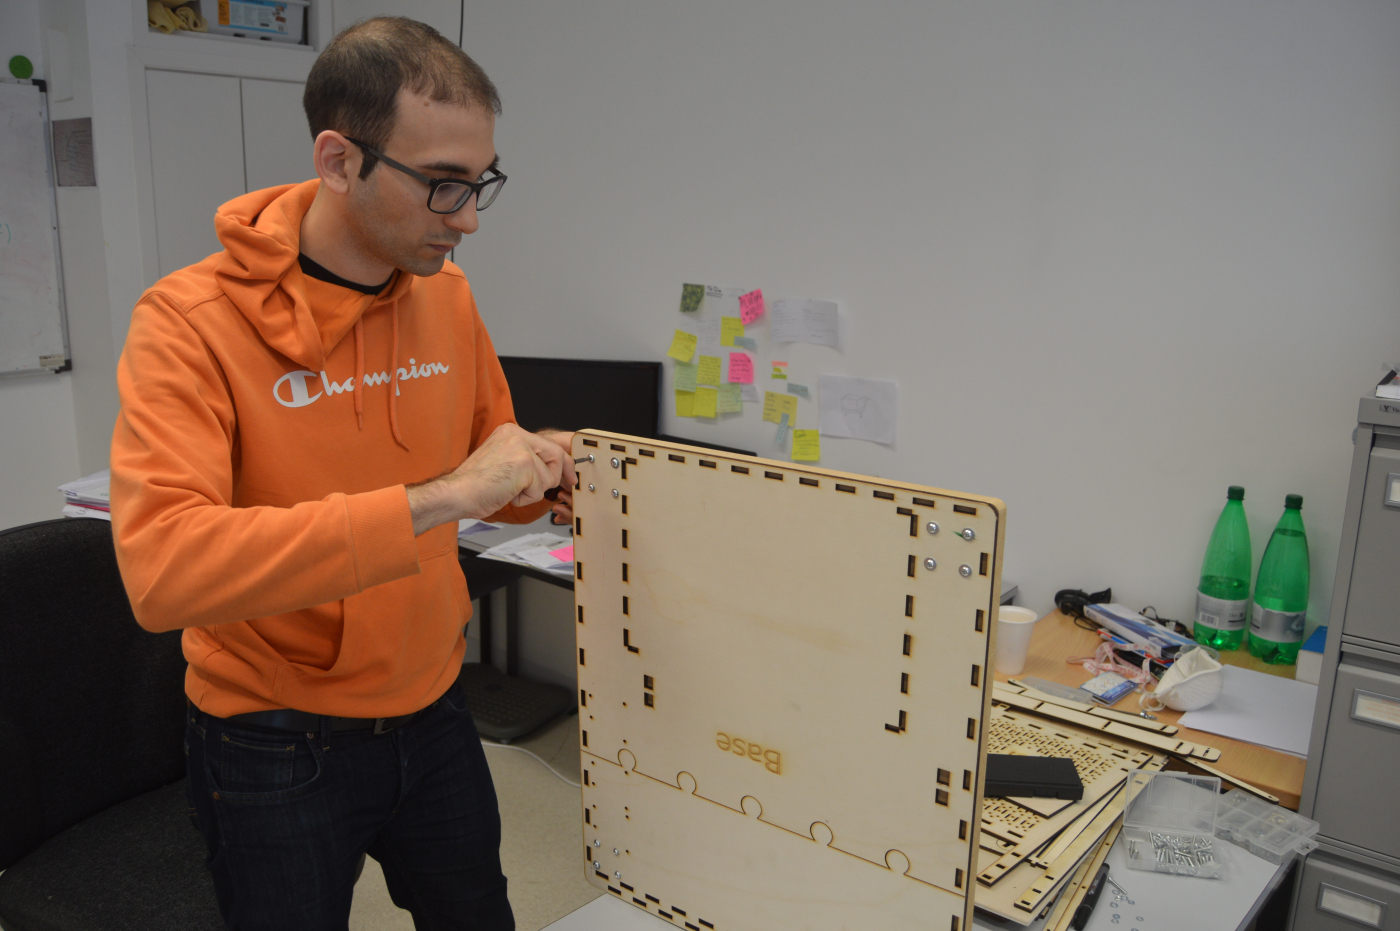
Hence, I chose to take the route of laser-cutting! I started laser-cutting
cardboard as a cheap and relatively robust material.

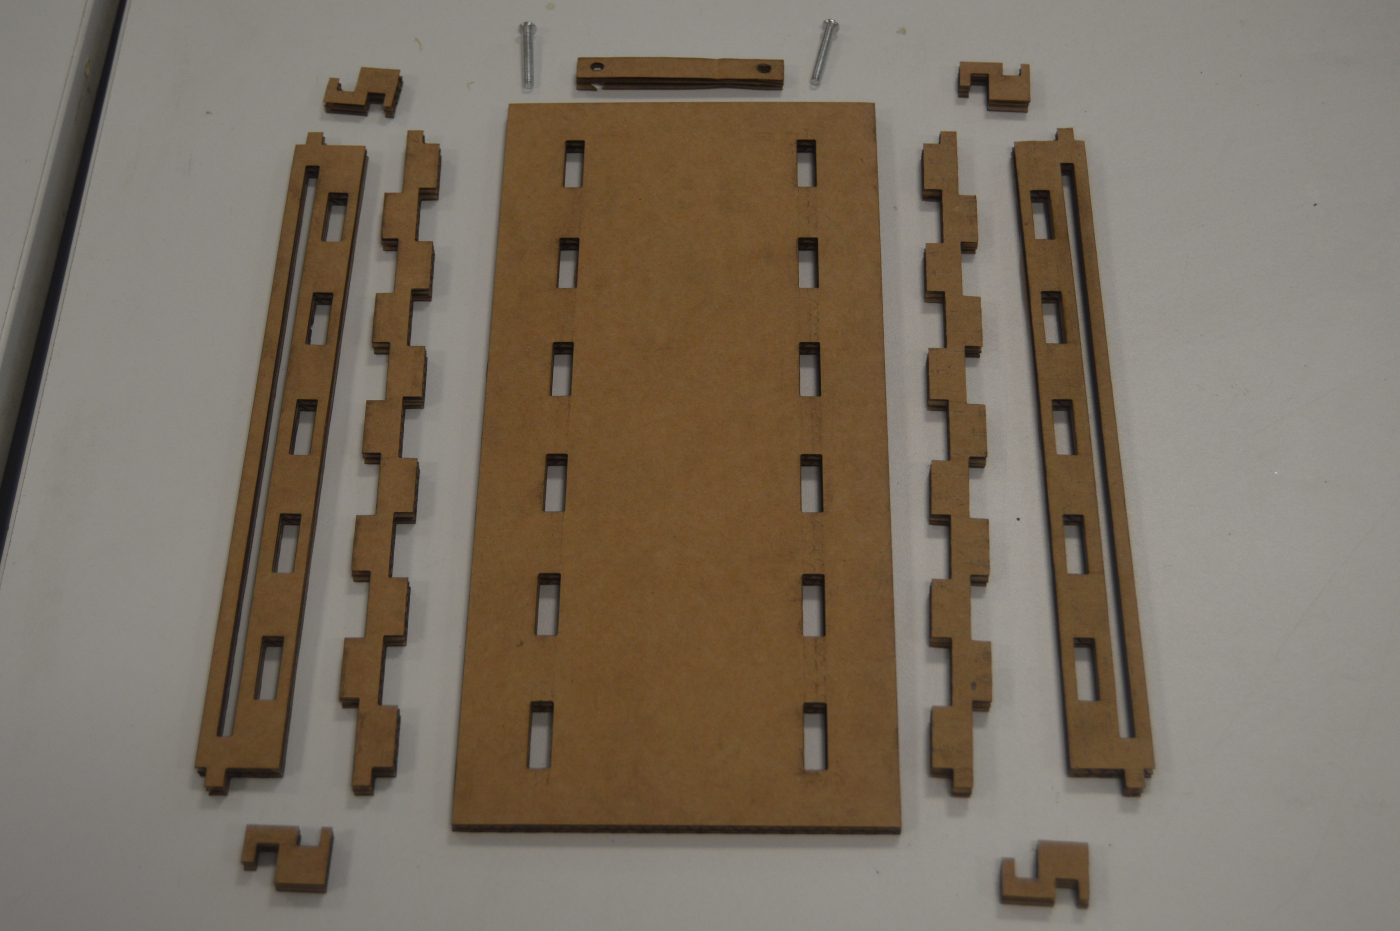
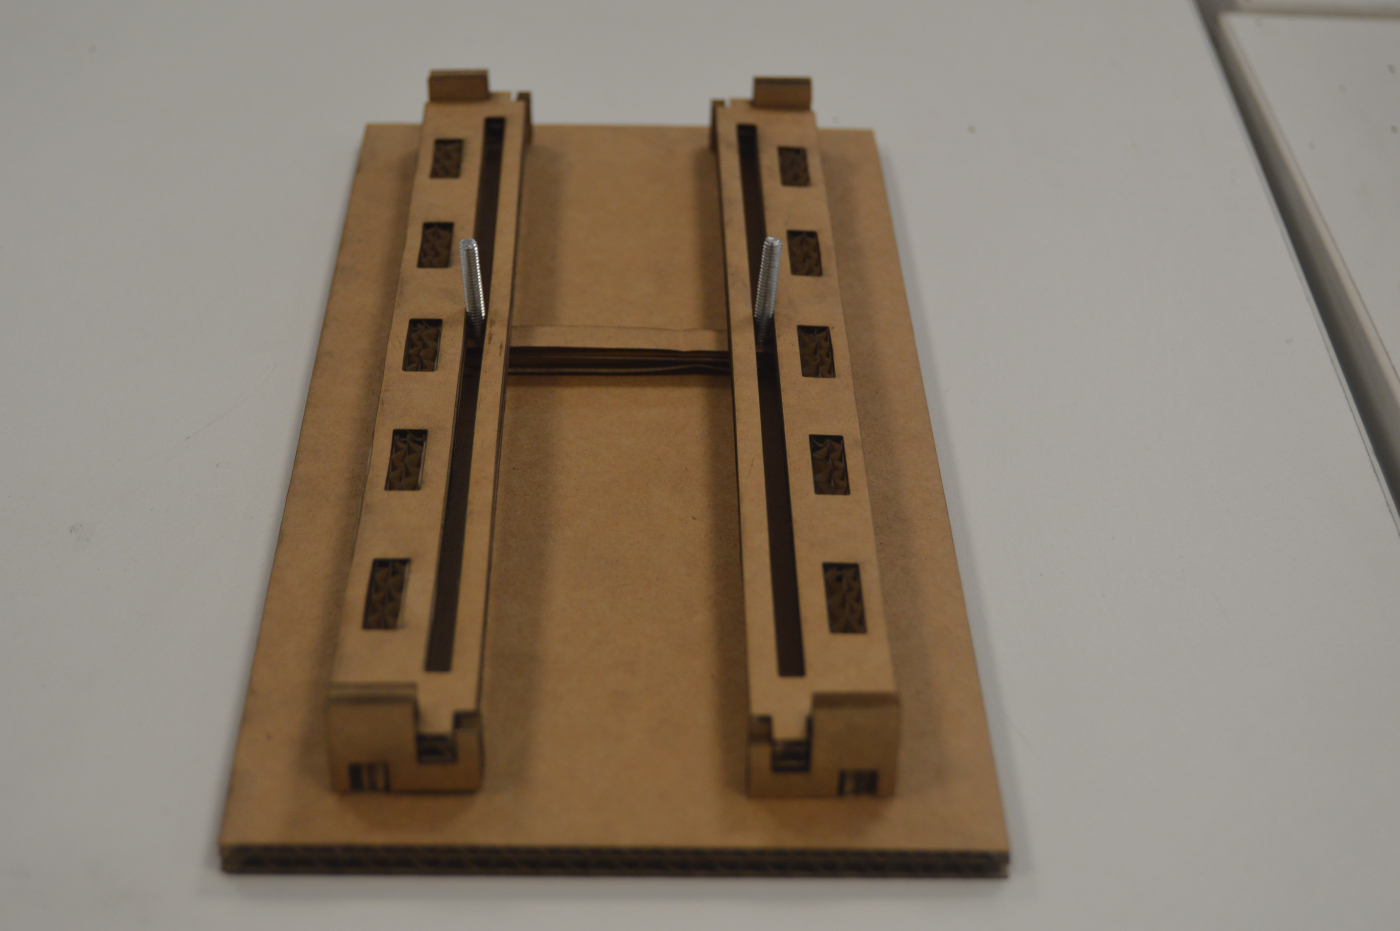
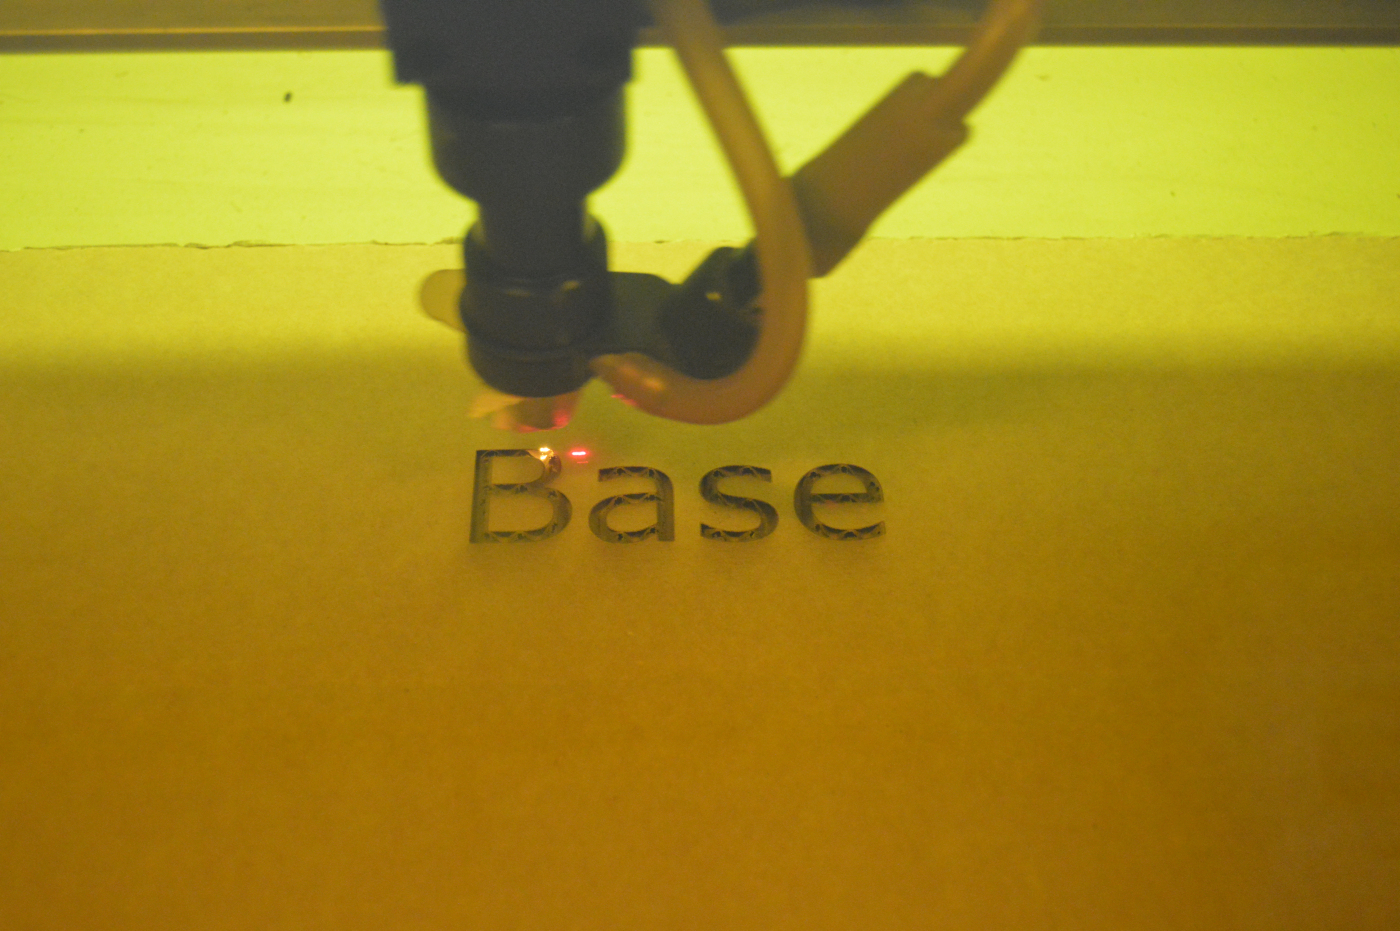
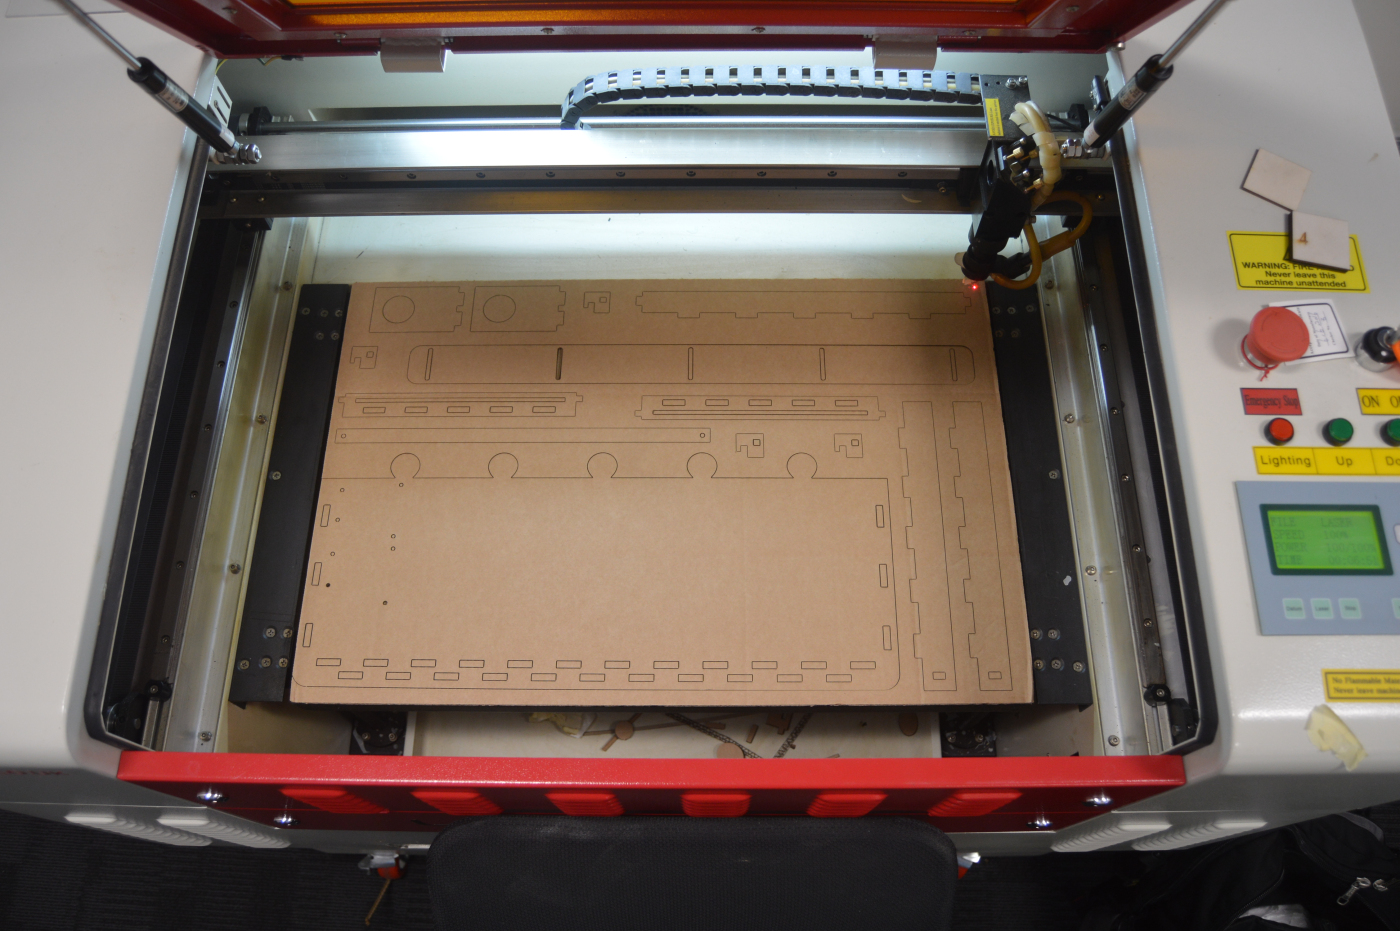
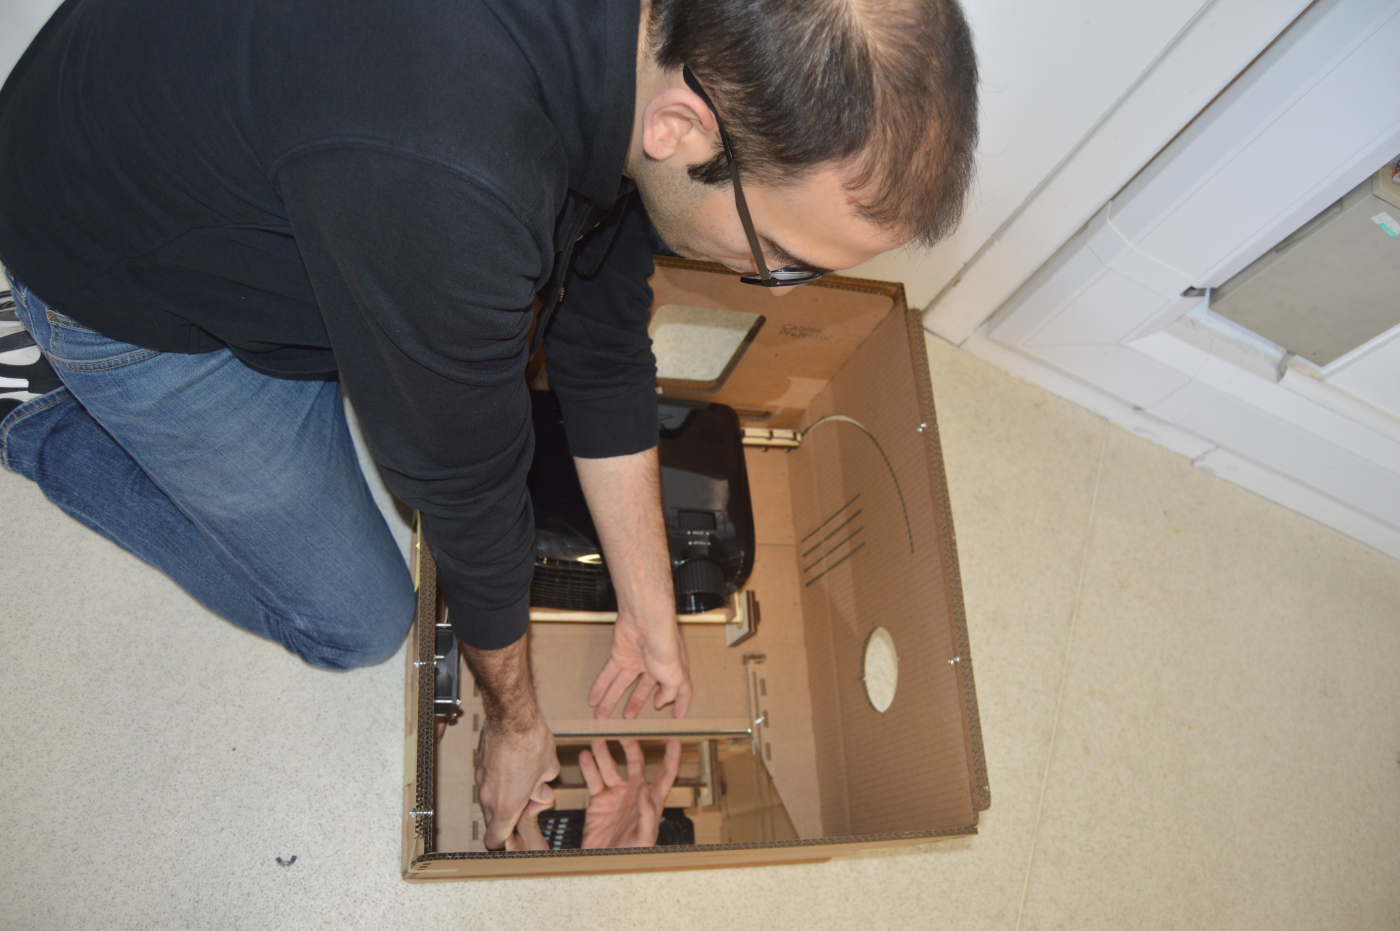
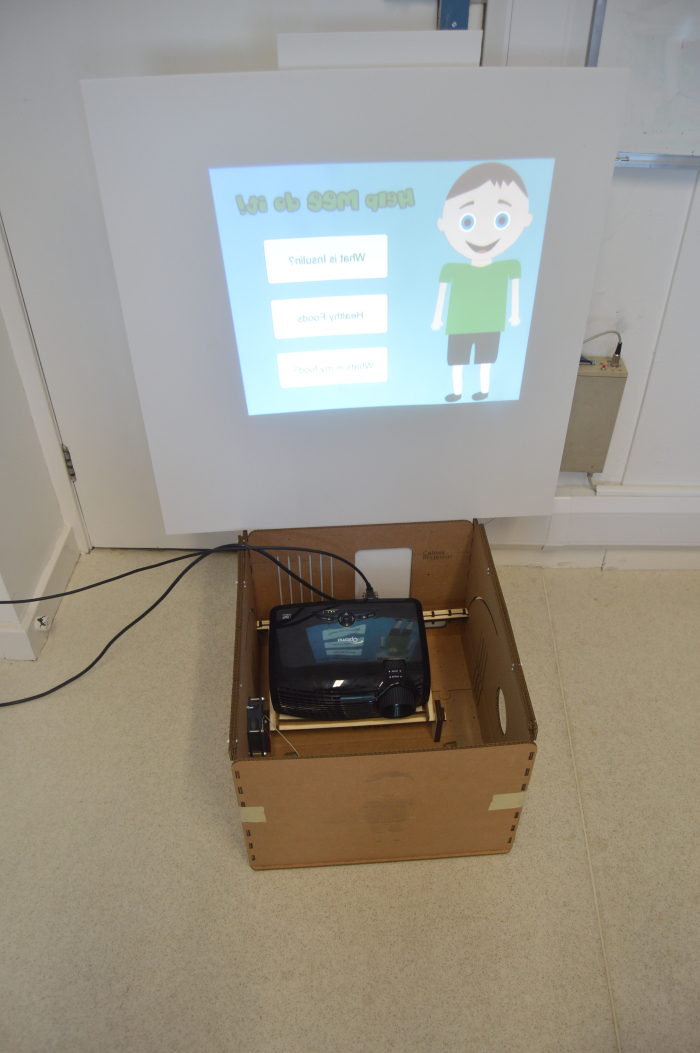
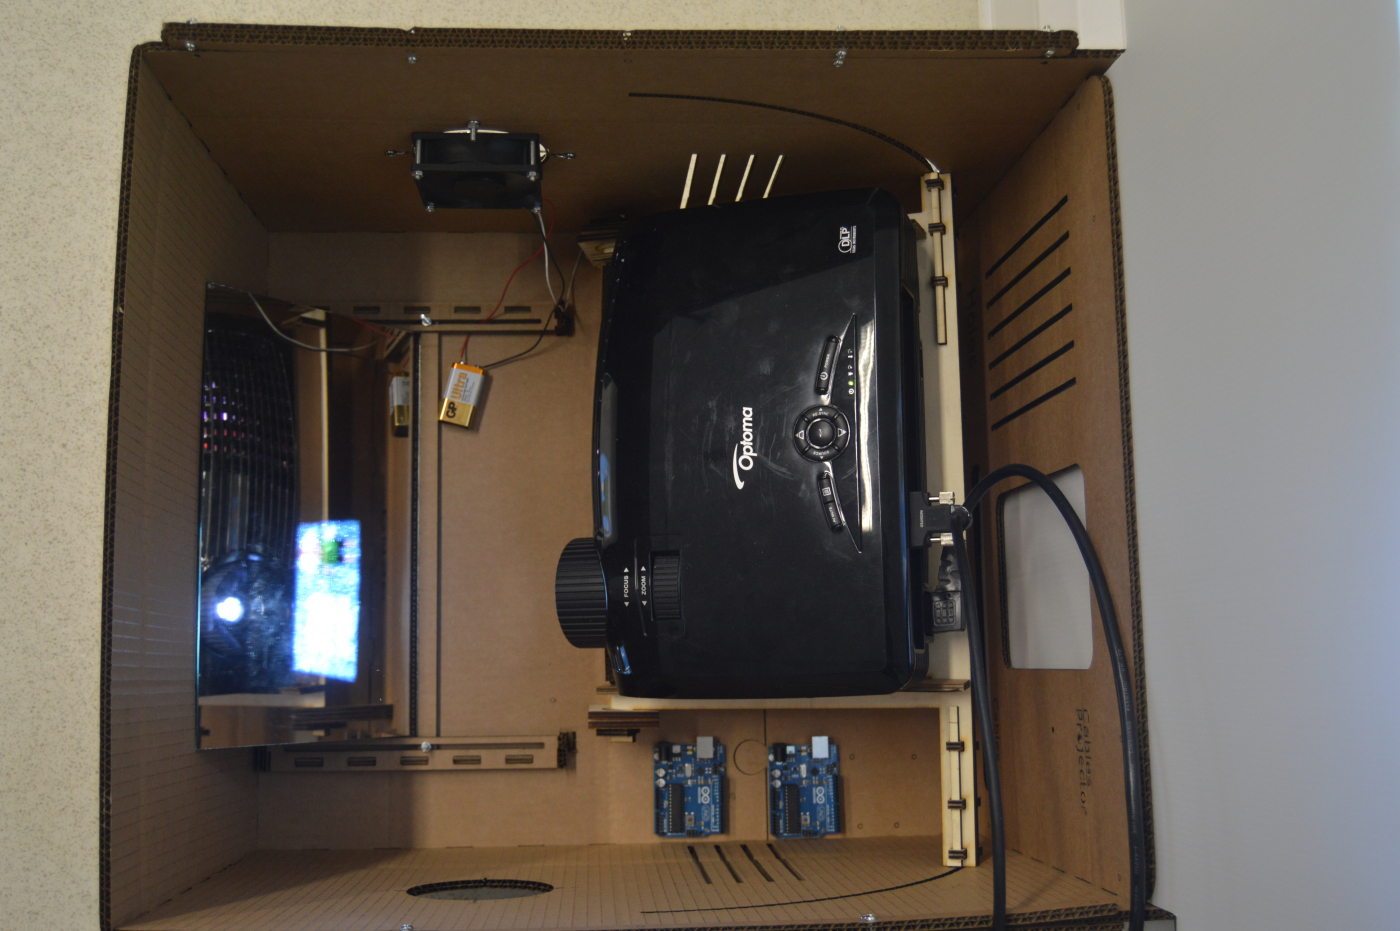


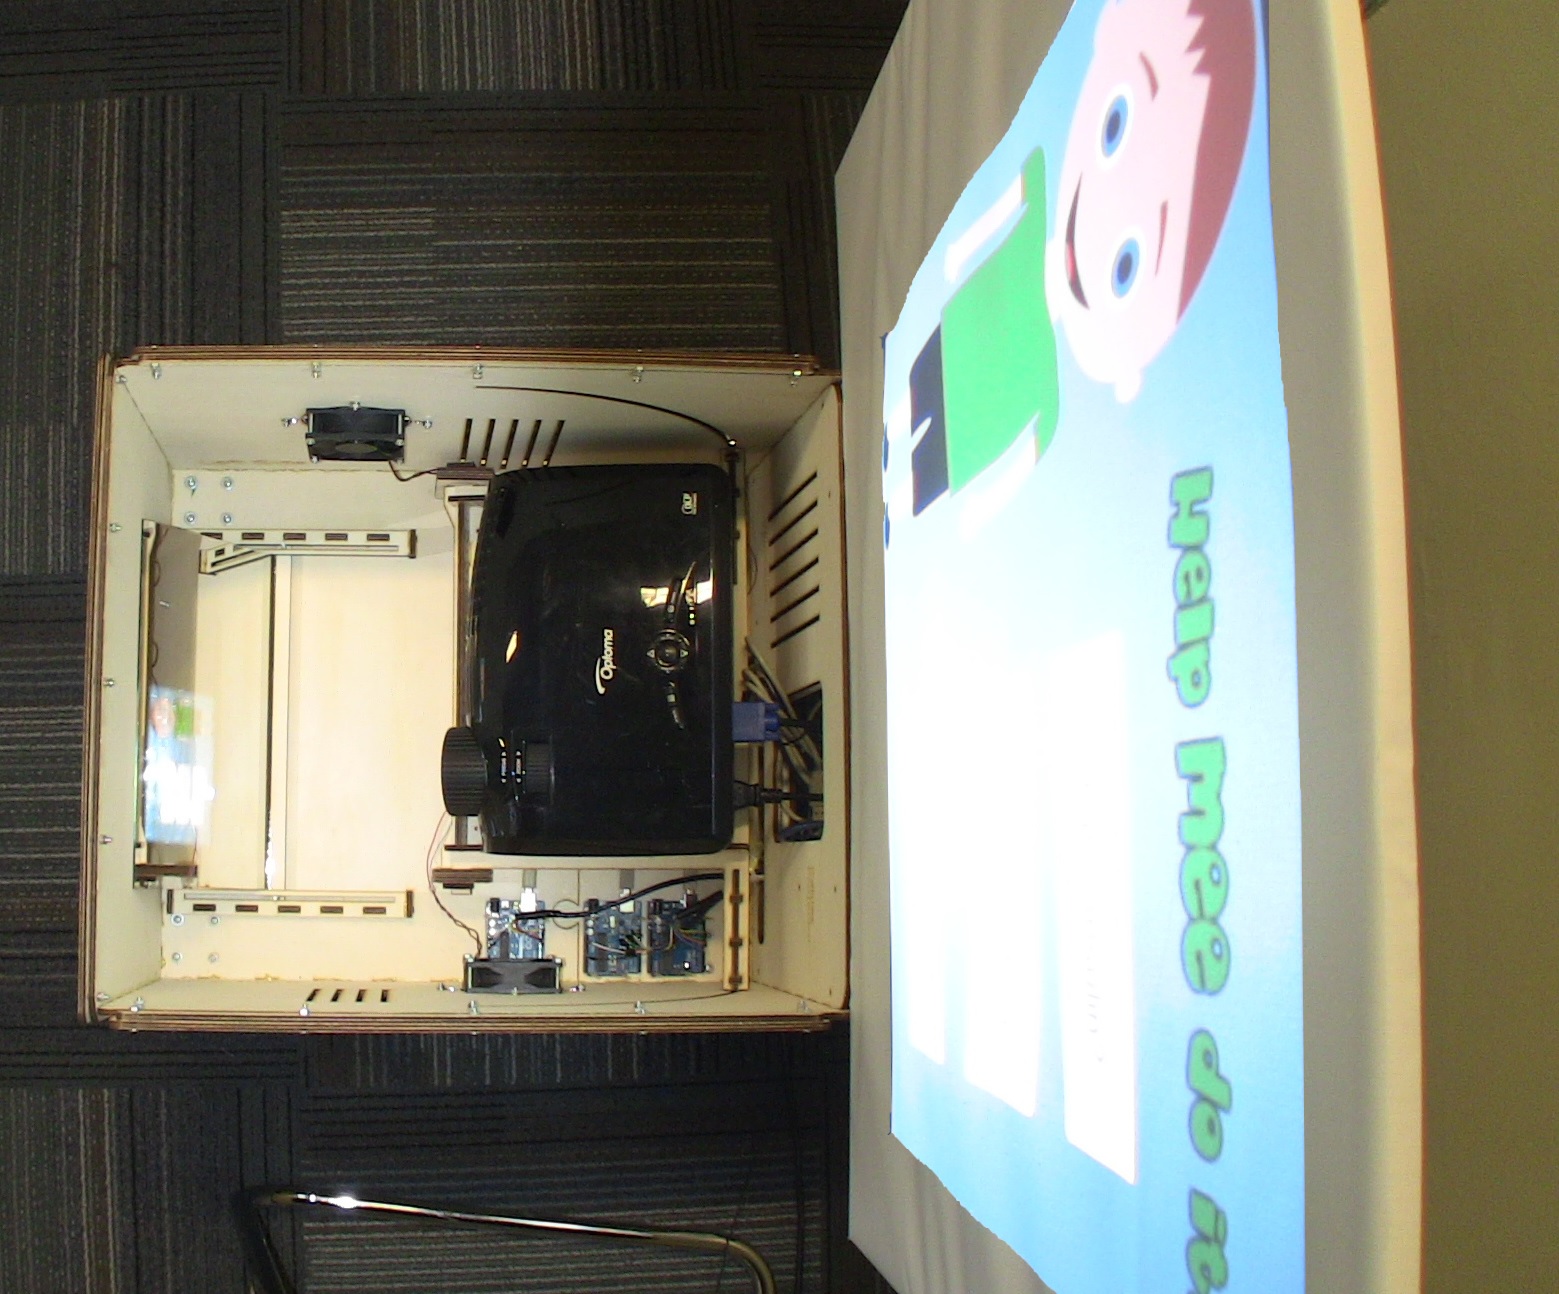

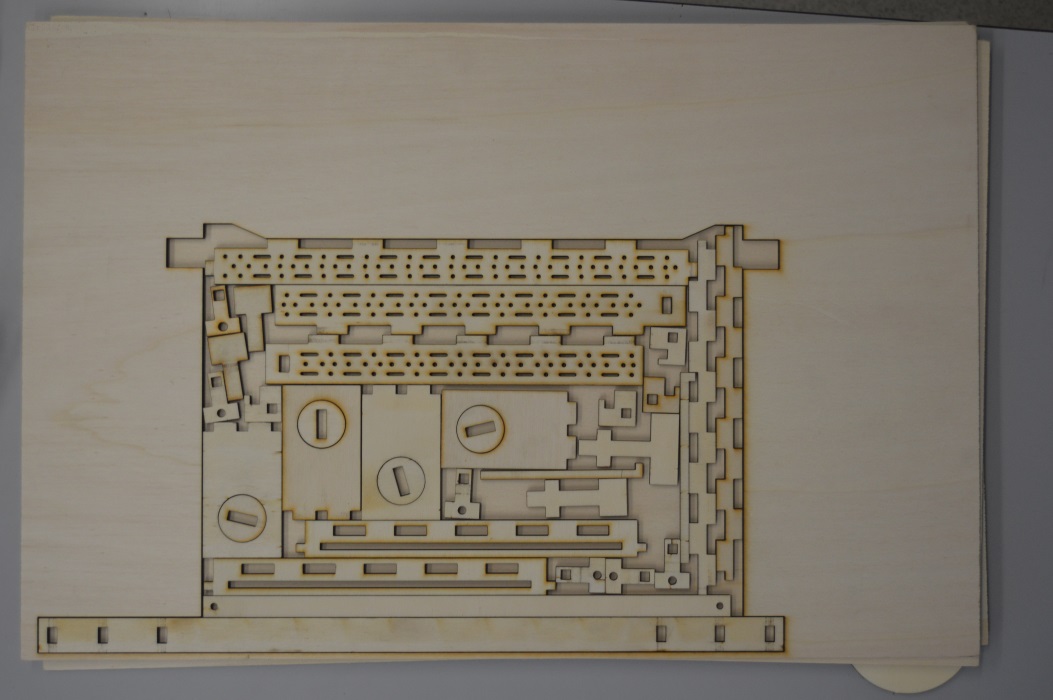


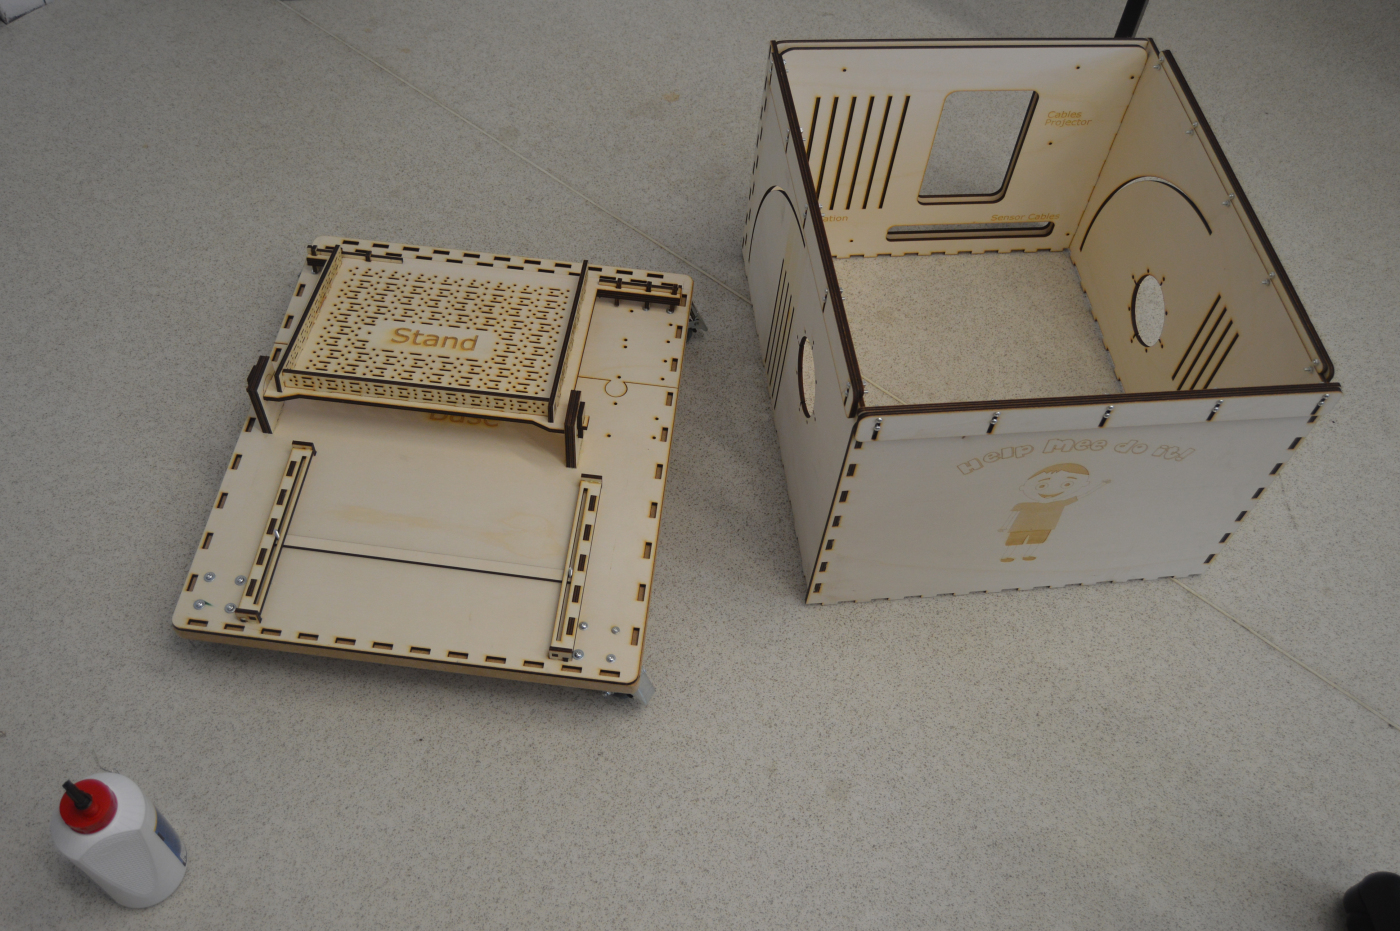


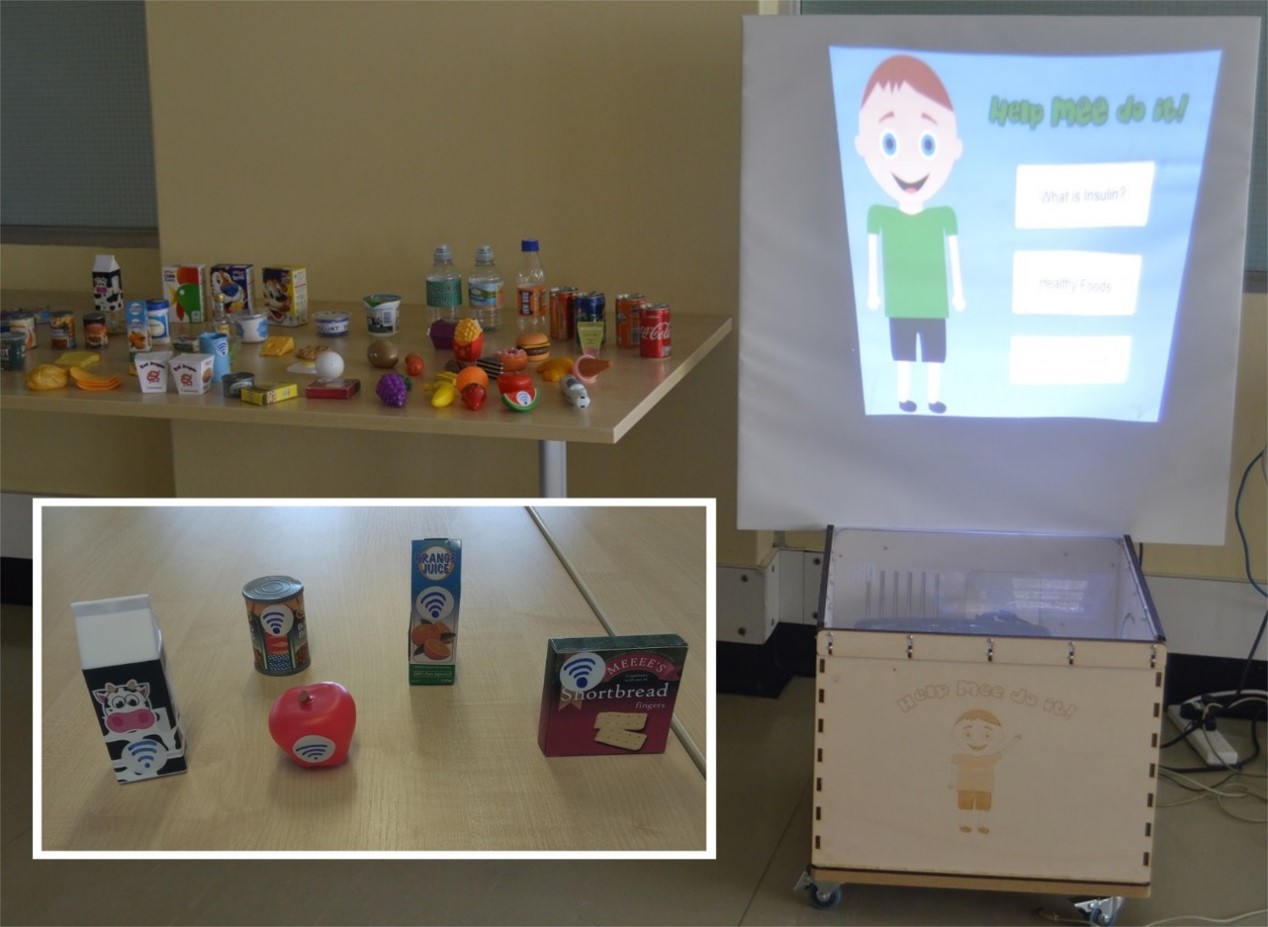
The final prototype with the plastic food toys can be seen on Figure 9.
Evaluation
The tool was evaluated in Yorkhill children's diabetes service in Glasgow
by 17 children (7 boys and 10 girls; mean age=7 and deviation = 1.3)
and 4 clinicians participated in the evaluation. The children
participants translate to the 11% of the total number of children (154)
between 5 and 9 years with T1D in the Greater Glasgow area.
All of them were new to the study and were not involved in previous stages nor had
they seen the tool before.
NHS ethics were acquired for the evaluation.
Results
The clinicians found the tool very helpful in T1D education and capable of
supporting different educational needs and helping them assess children’s knowledge.
Lastly, they found potential value if the tool was implemented to the standard
educational practice.
Parents were very confident about the tools appropriateness
for this age group and found it very engaging. They reported a incidents
when their children (after the session) put the things learned into practice:
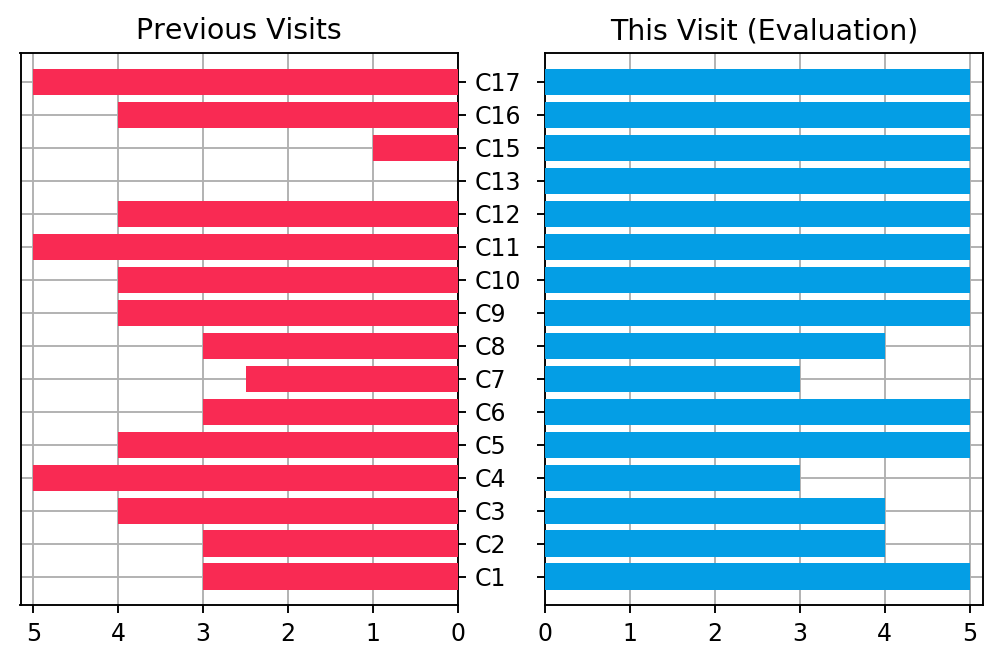
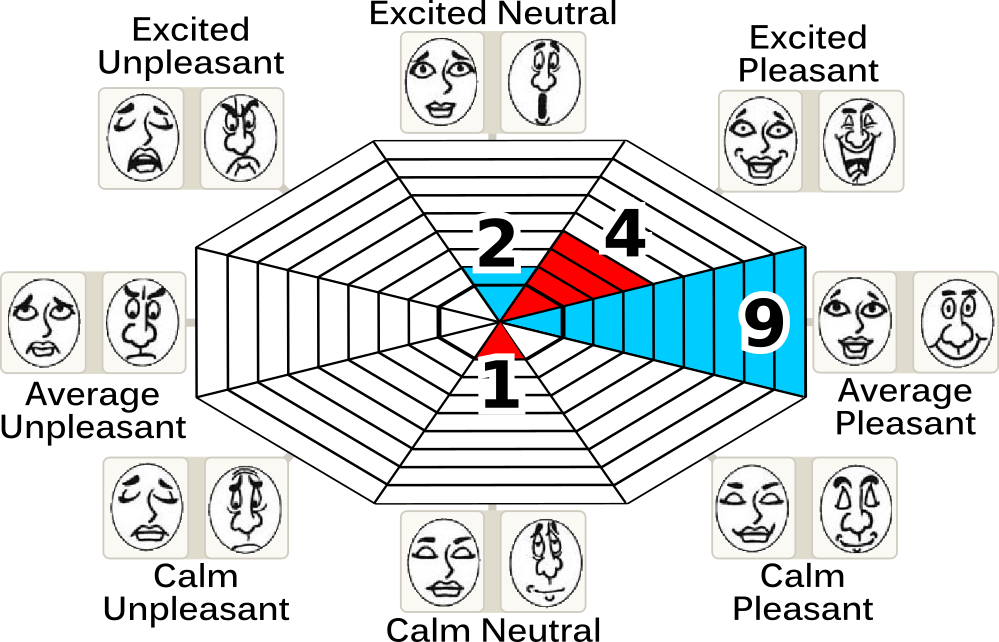
All children reported a pleasant or a neutral emotion during the educational
session. Moreover, the results from the smilometers shown a
significant increase in the experience during the evaluation compared to previous
visits.
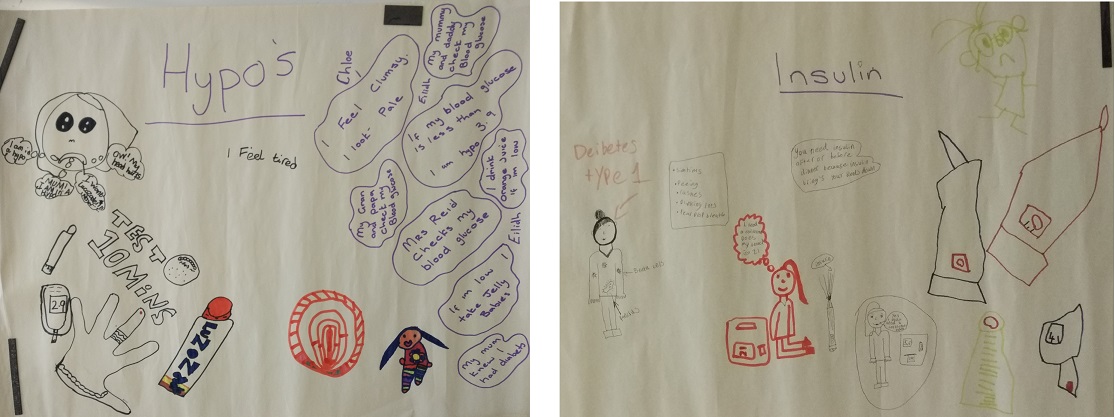
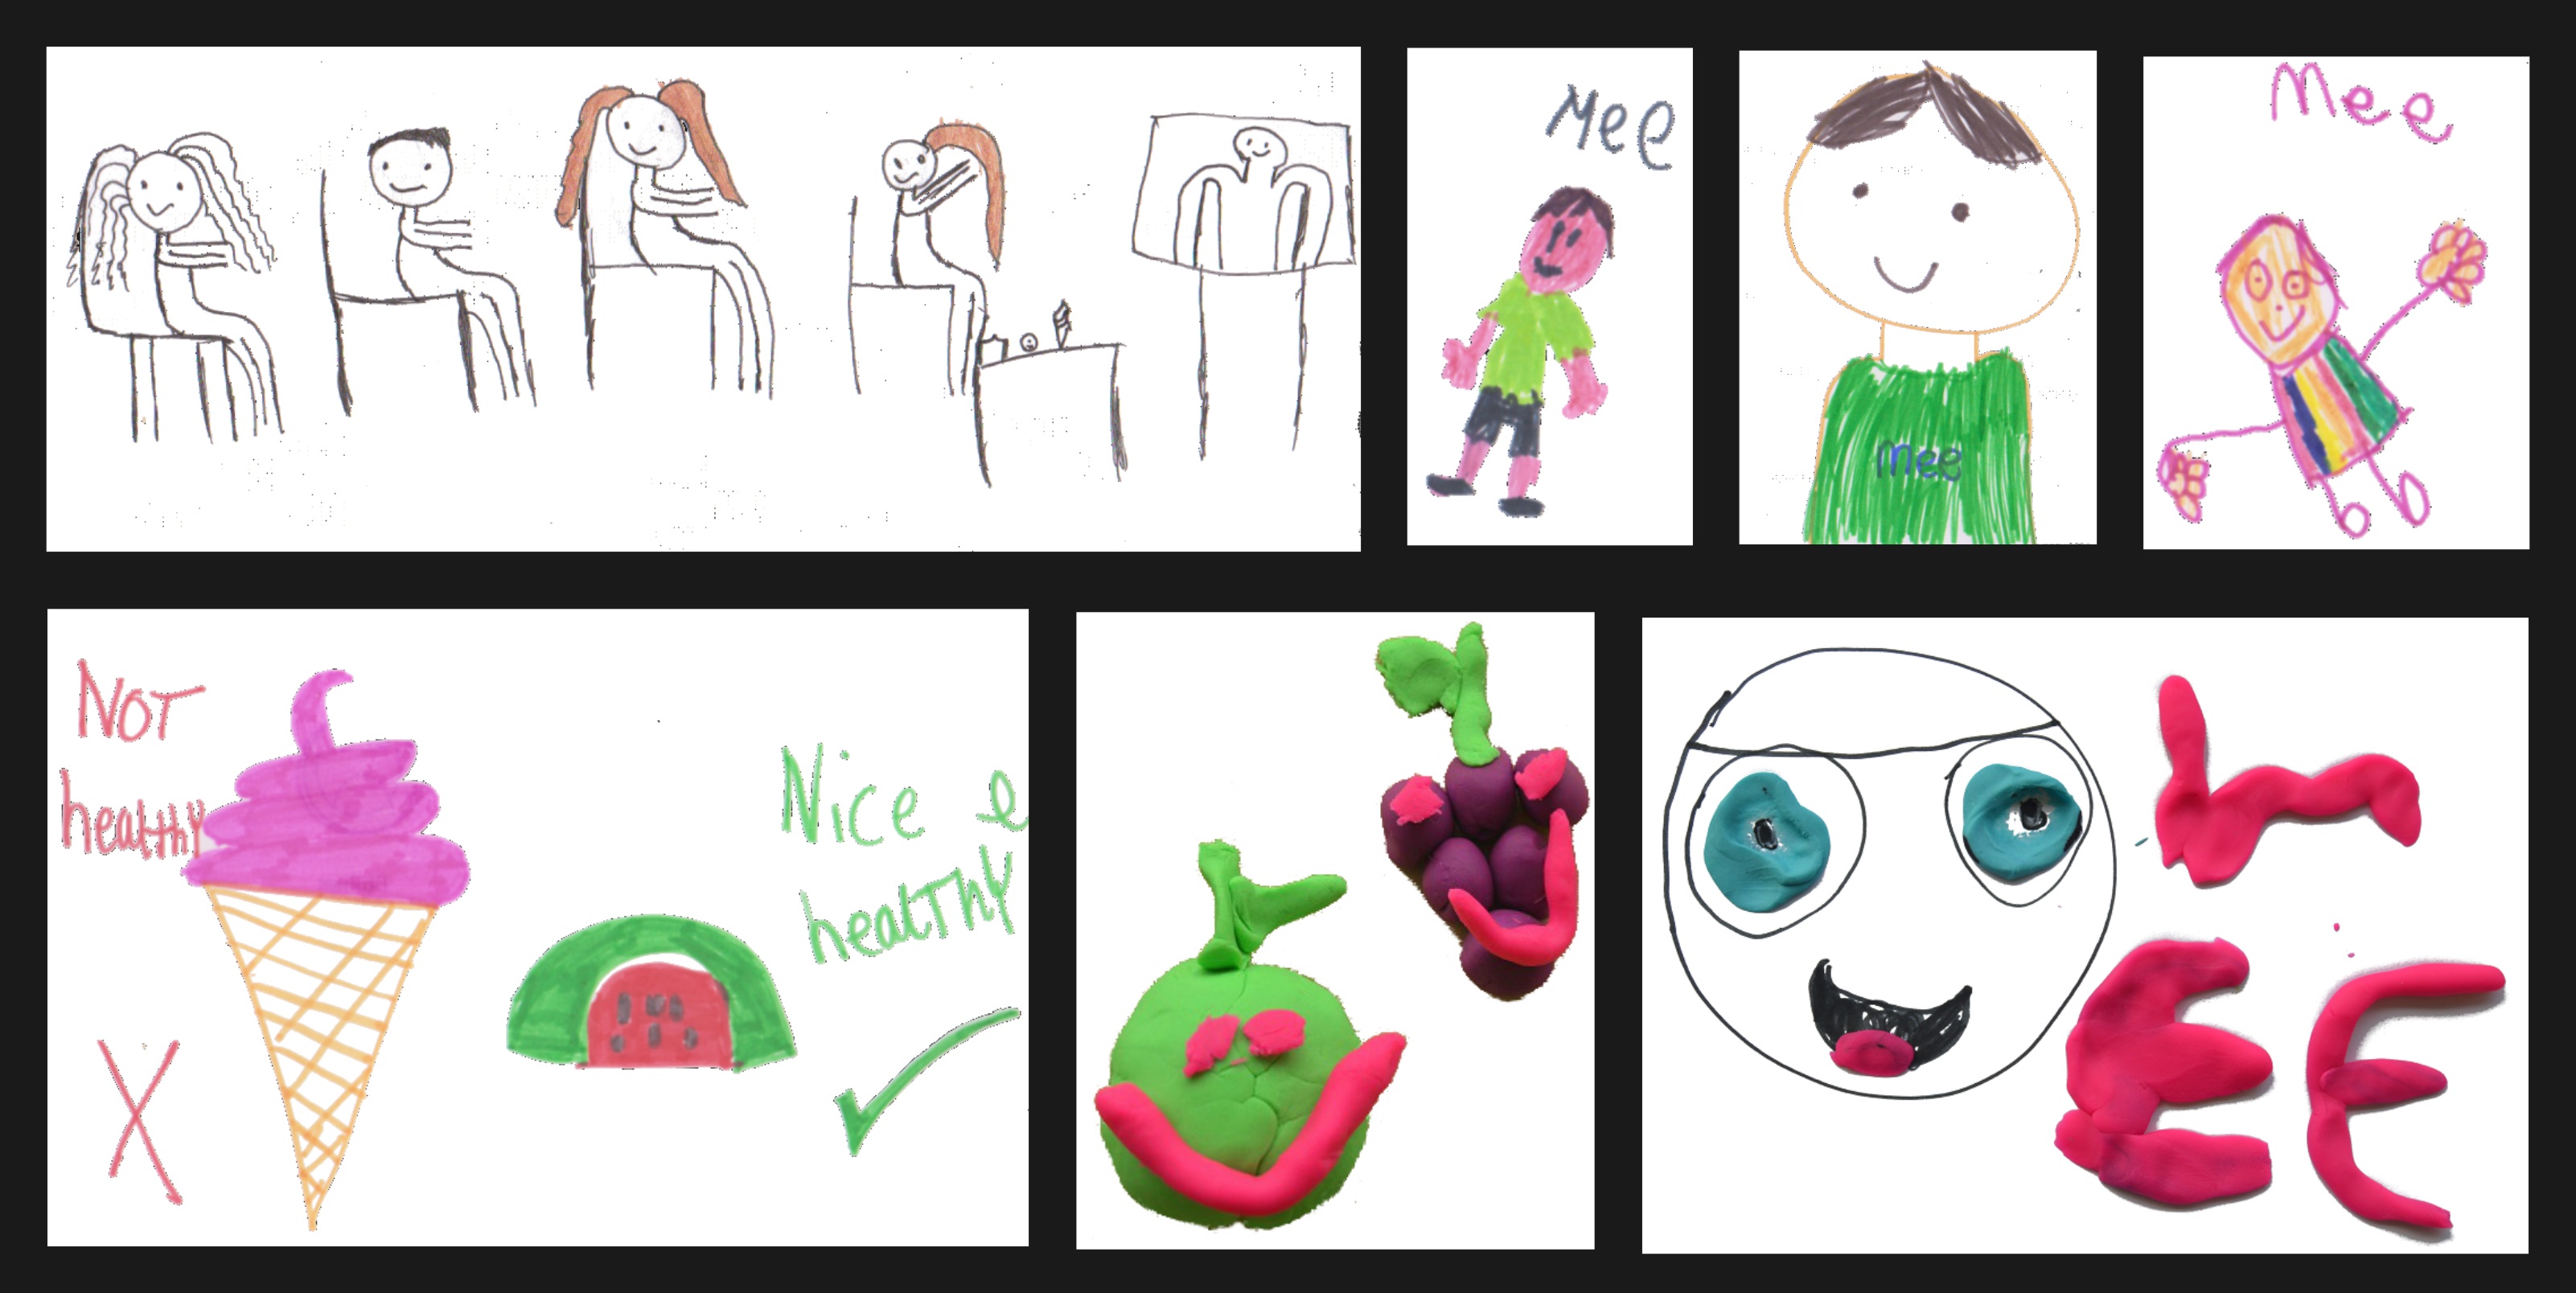
Lastly, children after the session expressed themselves by drawing and crafting
their experiences with the session.
Three academic publications about this project have been published so far with later being on CHI2019.